Recipe Overview
Oh, my friend, let me tell you about this cabbage bread recipe! It’s more than just a recipe; it’s a warm hug in a loaf, a reminder of cozy kitchen afternoons, and a testament to how simple, humble ingredients can create something truly extraordinary. If you’ve never imagined cabbage finding its way into a bread recipe, prepare to be absolutely delighted. This isn’t your typical leafy green side dish; it’s about transforming tender, shredded cabbage into a surprisingly moist, flavorful addition that elevates simple dough into a rustic, comforting masterpiece.
I first stumbled upon the idea of cabbage bread years ago, looking for creative ways to use up the perpetual abundance of cabbage from our garden (or maybe it was just a particularly good sale at the market, my memory gets a bit hazy, but the *feeling* is crystal clear!). I was skeptical, I won’t lie. Cabbage in bread? But one bite, just *one* bite of that first loaf, and I was hooked. The cabbage wilts down, softening the bread’s crumb and adding a subtle, earthy sweetness and beautiful texture that’s utterly irresistible. It’s become a cherished recipe I return to time and time again.
Why You’ll Absolutely Love This Cabbage Bread Recipe
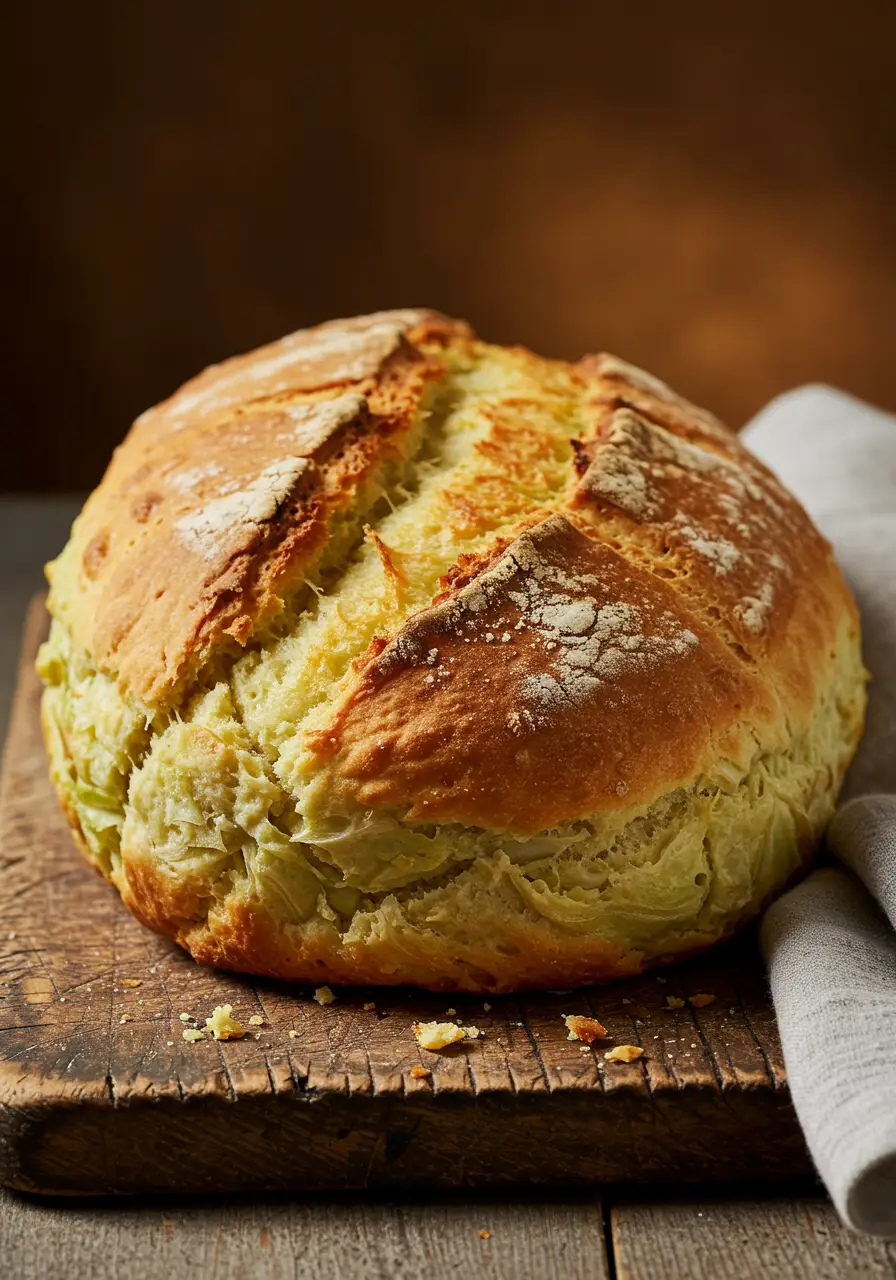
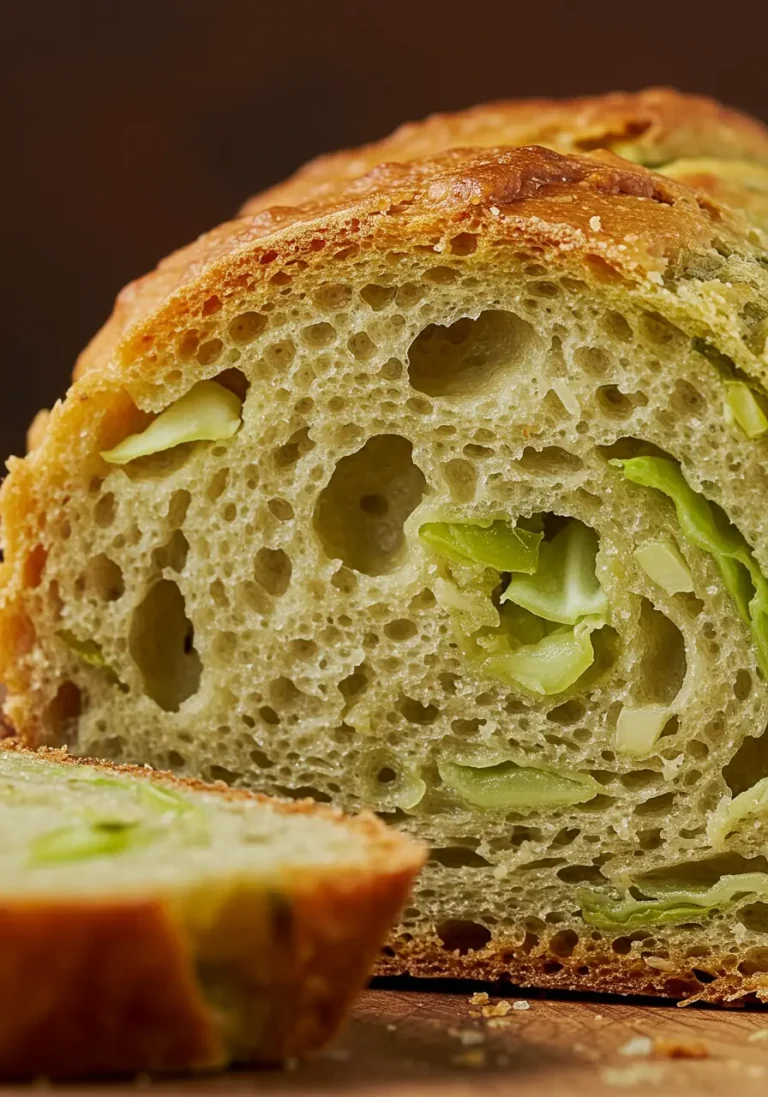
Let me transport you back to my kitchen the first time I pulled a loaf of this cabbage bread from the oven. The aroma was incredible – a mix of warm yeast, baked flour, and that distinct, comforting scent of cooked cabbage, but somehow transformed. It filled the house with a cozy promise. Cutting into it, the steam billowed out, revealing a crumb speckled with tender green ribbons of cabbage. It wasn’t dense or heavy; it was beautifully soft and yielding, with a perfect golden crust. Taking that first bite, warm with a smear of butter, was pure bliss. It’s all about that *humble ingredient magic*!
Beyond the pure deliciousness, this cabbage bread recipe solves a couple of common kitchen conundrums. Got a head of cabbage languishing in the fridge? This is its glorious destiny! Looking for a unique bread recipe that’s hearty but not heavy, perfect for pairing with soups or stews, or simply enjoyed on its own? You found it. It’s budget-friendly, adaptable, and surprisingly easy to master, even if you’re new to bread making. Ready to experience this comforting delight yourself? Let’s dive in!
Cabbage Bread Recipe Ingredients
Full Ingredient List
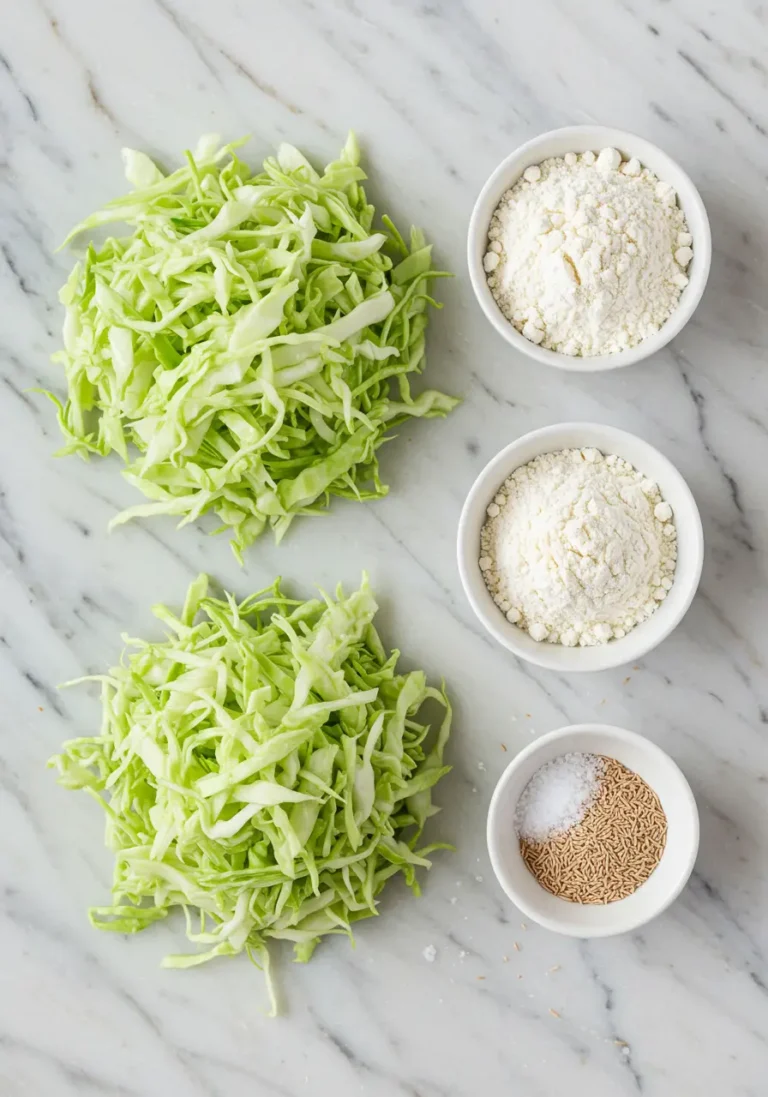
Here’s everything you’ll need to bring this comforting cabbage bread to life. Most of these are likely staples in your pantry and fridge already!
- Active Dry Yeast: 2 ¼ teaspoons (one standard packet)
- Warm Water: 1 ½ cups (around 105-115°F / 40-46°C). Make sure it’s warm, not hot!
- Granulated Sugar: 1 tablespoon
- All-Purpose Flour: 3 ½ to 4 cups, plus more for dusting. I always start with 3 ½ and add more as needed during kneading.
- Salt: 1 ½ teaspoons
- Olive Oil: 2 tablespoons, plus a little extra for the bowl
- Green Cabbage: 2 cups, finely shredded and lightly packed. About ¼ to ½ of a medium head.
- Onion: ½ cup, finely chopped (optional, but adds great flavor!)
- Butter: 1 tablespoon, unsalted, melted, for brushing (optional)
Easy Ingredient Swaps & Simple Substitutions
One of the things I love about this cabbage bread is how flexible it is. Don’t have exactly what the recipe calls for? No worries! Here are a few swaps I’ve tried:
- Gluten-Free Option: While a direct 1:1 swap can be tricky with yeast breads, you can try a gluten-free all-purpose flour blend specifically designed for yeast baking. You might need slightly less liquid and the dough might handle differently – it often works better as a no-knead or very gentle knead dough. Follow the flour blend package instructions for best results.
- Vegan: This recipe is already naturally vegan! Just omit the optional melted butter brush at the end, or use a plant-based butter alternative.
- Using Different Cabbage: While green cabbage is my favorite here, you could experiment with savoy cabbage for a slightly different texture. Red cabbage would work, but it might dye your bread a funny color!
Smart Shopping & Savvy Savings Tips
Cabbage is one of the most budget-friendly vegetables out there, making this cabbage bread recipe incredibly economical! Look for heads that feel heavy for their size and have tightly packed leaves – that’s a sign of freshness. You can often buy half or quarter heads at the grocery store if you don’t need a whole one, reducing waste and cost.
To store a cut head of cabbage, wrap the cut surface tightly in plastic wrap before returning it to the fridge. It will last for quite a while this way! Shredded cabbage can be stored in an airtight container in the fridge for 2-3 days, though it’s best used fresh for optimal moisture.
The Essential Equipment for This Recipe
You don’t need a fancy bread-making setup for this cabbage bread. Chances are, you have everything you need already!
- Large Mixing Bowl: For activating the yeast and mixing the dough. A sturdy ceramic or glass one works great.
- Measuring Cups and Spoons: For accuracy!
- Wooden Spoon or Dough Whisk: For initial mixing.
- Clean Surface or Large Cutting Board: For kneading the dough. A silicone baking mat also works wonderfully for preventing sticking.
- Bench Scraper (Optional but helpful): Great for dividing dough and cleaning your surface.
- Sharp Knife: For shredding cabbage and chopping onion.
- Baking Sheet or Loaf Pan: You can bake this as a freeform loaf on a baking sheet or in a standard 9×5 inch loaf pan for a more uniform slice. I love a rustic freeform shape myself!
- Wire Rack: For cooling the bread after baking. Essential for a good crust!
How to Make Cabbage Bread: Step-by-Step Instructions
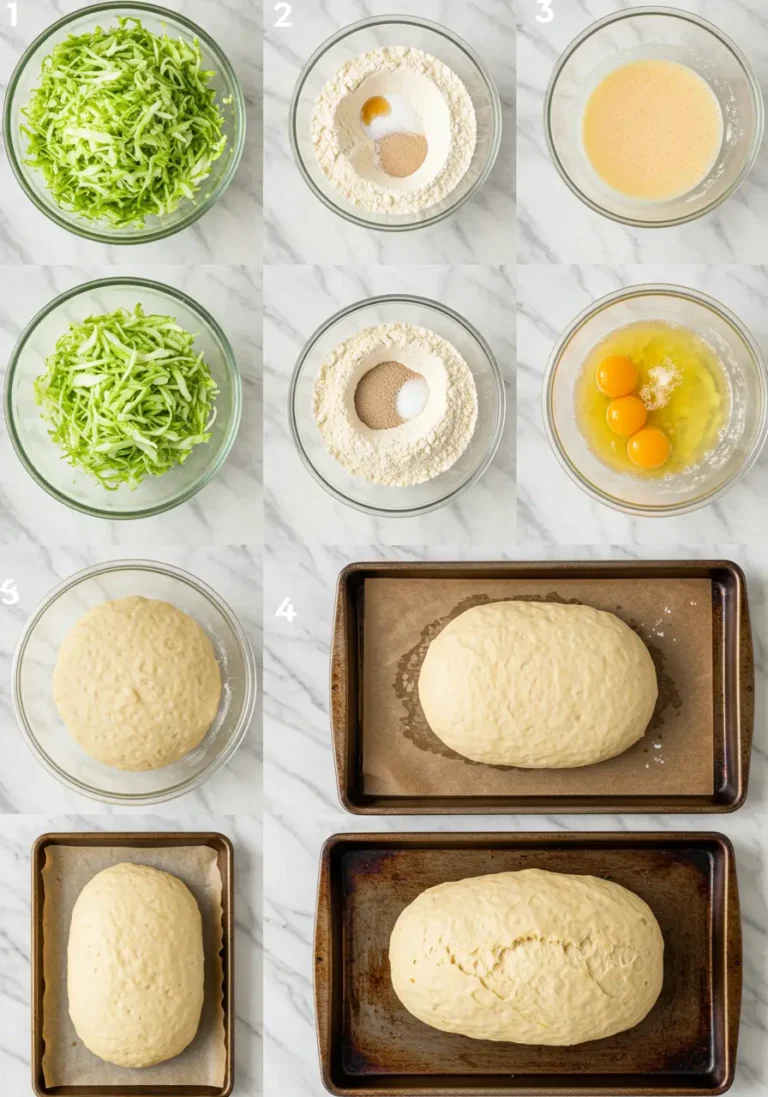
Let’s get our hands floury! Follow these steps and you’ll have a glorious loaf of cabbage bread warming your kitchen in no time. Remember, bread making is an art *and* a science, but mostly it’s about getting a feel for the dough. Don’t be afraid to get in there!
- Activate the Yeast: In your large mixing bowl, combine the warm water (make sure it’s not too hot, or you’ll kill the yeast!), sugar, and active dry yeast. Give it a gentle stir. Let it sit for 5-10 minutes until it looks foamy and bubbly on top. This tells you your yeast is alive and ready to work its magic!
- Add Wet Ingredients & First Batch of Flour: To the activated yeast mixture, stir in the salt and olive oil. Add 2 cups of the all-purpose flour. Stir with a wooden spoon or dough whisk until just combined and you have a shaggy dough.
- Prepare the Cabbage (Optional Step for Onion): While the yeast activates or just before adding flour, finely shred your cabbage. If using onion, finely chop it. You can sauté the onion in a little oil for a few minutes until softened before adding, or add it raw – raw will give a slightly stronger flavor. Add the shredded cabbage (and sautéed or raw onion, if using) to the shaggy dough mixture.
- Incorporate Remaining Flour: Begin adding the remaining flour, ½ cup at a time, mixing after each addition, until the dough starts to pull away from the sides of the bowl. It will still be sticky at this point, but manageable. You might not need all 4 cups, or you might need a touch more – it depends on your flour, humidity, etc.
- Knead the Dough: Turn the dough out onto a lightly floured surface. Knead the dough for 8-10 minutes. Start by folding the dough towards you, pressing down and away with the heels of your hands, rotating slightly, and repeating. This develops the gluten, which is crucial for the bread’s structure. **The dough should become smooth, elastic, and less sticky, though it might still have a slight tackiness. You’ll feel a real difference in its texture.** If it’s too sticky, add just a tablespoon of flour at a time.
- First Rise (Bulk Fermentation): Lightly grease your large mixing bowl with a little olive oil. Place the kneaded dough in the bowl, turning it to coat all sides with oil. Cover the bowl tightly with plastic wrap or a damp kitchen towel. Place in a warm place to rise until doubled in size, about 1 to 1.5 hours. A slightly warm oven (turned off) or a sunny spot on the counter works well.
- Shape the Loaf: Once the dough has doubled, gently punch it down to release the air. Turn the dough out onto your lightly floured surface. You can gently shape it into a round or oval loaf for a freeform bake, or shape it into a log and place it seam-side down in a greased 9×5 inch loaf pan.
- Second Rise (Proofing): Cover the shaped loaf (either on the baking sheet or in the pan) loosely with plastic wrap or a light kitchen towel. Let it rise again in a warm spot for another 30-45 minutes, or until it looks noticeably puffy and has almost doubled in size. While it’s rising, preheat your oven to 375°F (190°C). If baking on a sheet, you can line it with parchment paper.
- Bake the Bread: Place the loaf in the preheated oven. Bake for 30-40 minutes for a loaf pan, or 35-45 minutes for a freeform loaf. The bread is done when it’s golden brown on top and sounds hollow when tapped on the bottom. **If the top is browning too quickly, you can loosely tent it with aluminum foil.**
- Cool: Carefully remove the bread from the oven. If using a loaf pan, turn it out onto a wire rack immediately. If freeform, transfer it to the rack. Let the bread cool completely before slicing. **Slicing hot bread can make it gummy inside!** I know it’s hard to resist, but trust me on this!
Expert Insights: Tips, Tricks, and Culinary Hacks for Success
Over the years of making this cabbage bread (and countless other loaves!), I’ve picked up a few tricks that really help ensure success and make the process smoother. These little insights can make a big difference, especially with a dough that includes veggies!
- Don’t Skip Shredding Finely: Make sure your cabbage is shredded *very* finely. This helps it soften nicely within the bread without leaving large, chewy pieces. A mandoline or food processor with a shredding attachment makes this quick work, but a sharp knife and a little patience are perfectly fine too!
- Control Cabbage Moisture: Cabbage holds a lot of water. After shredding, you might want to lightly salt it and let it sit for 15-20 minutes, then squeeze out any excess moisture before adding it to the dough. This prevents the dough from becoming too wet. I often skip this if my dough is feeling a bit dry, but it’s a good trick if your dough seems too sticky.
- Listen to Your Dough: Don’t just rely on the flour measurements. Humidity, altitude, and even the way you measure flour can affect the dough. Feel it! It should be soft, pliable, and slightly tacky after kneading, not dry and stiff, or overly sticky. Add flour or water just a tablespoon at a time if needed during kneading.
- Warmth is Key for Rising: Yeast loves warmth! Your dough will rise faster and more reliably in a warm, draft-free spot. If your kitchen is cool, turn your oven on to its lowest setting (or just warm it slightly and turn it off), then place the covered bowl inside.
- Tapping for Doneness: That classic bread-making test – tapping the bottom of the loaf – is genuinely the best way to check for doneness. A hollow sound means the inside is cooked through. If it sounds dense or thud-like, it needs more time.
Did you know? Including vegetables like cabbage in bread dough actually helps keep the loaf moist for longer after baking. It’s a little bit of culinary magic!
Recipe Swaps & Variations for Cabbage Bread
Once you’ve mastered the basic cabbage bread recipe, have fun experimenting! This dough is a great canvas for other flavors.
- Cheesy Cabbage Bread: Add ½ cup of shredded cheddar cheese or Gruyere to the dough along with the cabbage for a savory, cheesy twist.
- Herbed Cabbage Bread: Incorporate 1-2 teaspoons of dried herbs like dill, caraway seeds, or parsley into the dough. Dill pairs particularly well with cabbage!
- Spicy Kick: Add a pinch of red pepper flakes or ½ teaspoon of black pepper with the salt for a subtle heat.
- Whole Wheat Cabbage Bread: Substitute up to half of the all-purpose flour with whole wheat flour for a heartier loaf. You might need a little extra liquid as whole wheat absorbs more.
- Garlic & Herb Butter Finish: Instead of plain melted butter, mix melted butter with minced garlic and fresh herbs (like chives or parsley) and brush over the hot loaf as soon as it comes out of the oven.
- Make Rolls Instead: Divide the dough after the first rise into smaller portions (about 8-12) and shape them into rolls. Reduce the baking time to 20-25 minutes.
Perfect Pairings: What to Serve with Cabbage Bread
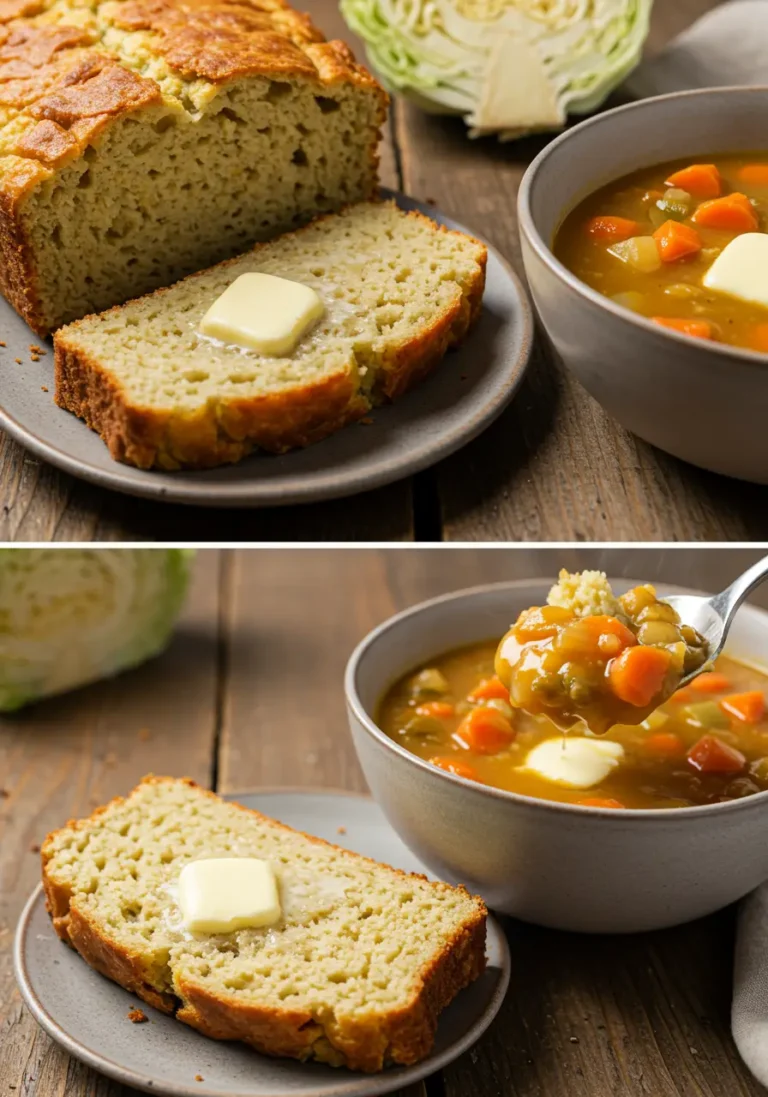
This cabbage bread is incredibly versatile! It’s substantial enough to be a simple snack or part of a light meal, but also makes a fantastic accompaniment to heartier dishes. Here are some of my favorite ways to enjoy it:
- With Soup or Stew: This is its natural partner! A thick lentil soup, a hearty beef stew, or a comforting potato and leek soup are all perfect pairings. Use it for dipping and soaking up every last drop.
- As a Side for Roasts: It’s wonderful alongside roasted chicken, pork tenderloin, or a simple pot roast. The subtle cabbage flavor complements savory meats beautifully.
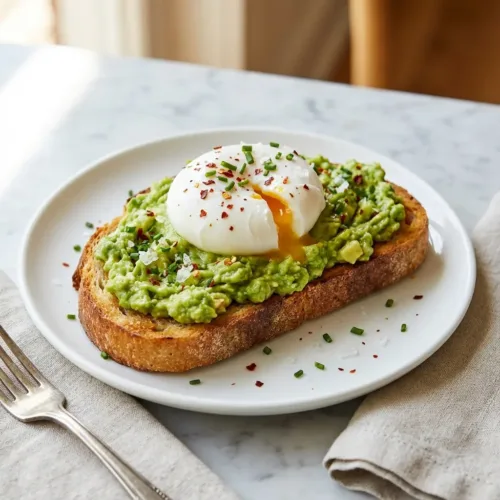
- With Eggs: Toasted slices make a fantastic base for fried eggs or a side for scrambled eggs at breakfast or brunch.
- Simple Snack: A warm slice with just butter, or perhaps some cream cheese, is pure comfort.
- For Sandwiches: While slightly softer than sandwich bread, thicker slices make surprisingly good bases for simple vegetable or cheese sandwiches.
- Cheese Board Addition: Its unique texture and flavor make it an interesting addition to a rustic cheese board, paired with hard cheeses or sharp cheddars.
For presentation, I love placing the freeform loaf on a rustic cutting board, perhaps with a linen napkin underneath. If using a loaf pan, a simple slice reveals the beautiful green flecks inside!
Storing Your Cabbage Bread
Proper storage will help keep your cabbage bread fresh and delicious for longer. Because of the added moisture from the cabbage, it tends to stay moist better than a plain lean bread, but it also means it can mold faster if not stored correctly.
- Countertop (Short-Term): For the first 1-2 days, you can store the cooled bread in a paper bag or a bread box on the counter. Avoid plastic wrap immediately after baking, as this can trap steam and make the crust soggy.
- Fridge (Longer-Term): If you won’t eat the loaf within a couple of days, or in warmer/humid climates, store it in an airtight container or wrapped tightly in plastic wrap in the refrigerator. It will last for 4-5 days in the fridge.
- Freezer (For extended storage): Cabbage bread freezes beautifully! Once completely cooled, wrap the whole loaf or individual slices tightly in plastic wrap, then in aluminum foil or place in a freezer-safe bag. Label and date it. It will keep in the freezer for up to 3 months.
To reheat: Thaw frozen bread overnight in the fridge or on the counter. You can warm slices in a toaster, or warm the whole loaf (wrapped in foil to prevent drying) in a 350°F (175°C) oven for 10-15 minutes until heated through. Always ensure it’s heated to a safe internal temperature if reheating fully.
Leftover hack: If the bread starts to get a little stale, cube it and make croutons! Toss the cubes with olive oil, salt, pepper, and perhaps some garlic powder, then bake at 375°F (190°C) until golden and crisp.
Printable Recipe Card
Here is the printable version of this delightful cabbage bread recipe. Happy baking!
Nutrition Breakdown: Calories, Protein, Fats & More
Here is an estimated nutritional breakdown for this cabbage bread recipe, based on approximately 12 servings per loaf. Remember, this is an estimate and can vary depending on exact ingredients, measurements, and serving size.
- Calories: Approx. 250-280 per serving
- Protein: Approx. 7-8g per serving
- Fat: Approx. 5-7g per serving
- Saturated Fat: Approx. 1g per serving
- Carbohydrates: Approx. 45-50g per serving
- Sugar: Approx. 2-3g per serving
- Sodium: Approx. 300-350mg per serving
Disclaimer: Nutrition data is an estimate and may vary based on ingredients, preparation methods, and serving sizes. It is provided for informational purposes only.
Recipe FAQ
Here are some common questions I get about making cabbage bread:
- Can I use instant yeast instead of active dry yeast? Yes, you can! Instant yeast can usually be added directly to the dry ingredients without proofing in warm water. You might find the rise time is slightly shorter as well.
- My dough isn’t rising. What went wrong? The most common culprits are inactive yeast (water too hot/cold, or old yeast) or a too-cold environment. Make sure your water temperature is correct and find a warm spot for rising.
- Why is my bread dense? This can be due to not kneading enough (underdeveloped gluten), adding too much flour (dough too stiff), or not letting the dough rise fully. Ensure your dough is elastic after kneading and allow it to double in size during the first rise.
- Can I add other vegetables? You could try adding other finely shredded or chopped vegetables like carrots, zucchini (make sure to squeeze out moisture!), or bell peppers, but keep the total amount of added vegetables roughly similar to the cabbage amount so you don’t overload the dough.
- How do I get a crispier crust? Baking on a preheated baking stone or steel can help. You can also create steam in your oven by placing a pan of hot water on the rack below your bread during the first 15-20 minutes of baking.
- Does it taste strongly of cabbage? Surprisingly, no! The cabbage softens and mellows considerably during baking. It adds moisture and a subtle, earthy note rather than an overwhelming cabbage flavor.
Happy Cooking & Share Your Results!
Seriously, this cabbage bread recipe is one of those hidden gems. It’s got that rustic charm, that comforting texture, and a flavor that’s both unique and familiar all at once. It’s perfect for those days when you want to bake something a little different, use up some pantry staples, and fill your home with the most wonderful smells. I promise, once you try it, it’ll become a regular in your baking rotation. It embodies that *humble ingredient magic* I just adore.
I truly hope you give this a try! If you make it, please come back and leave a comment below. I’d absolutely LOVE to hear how it turned out for you and what you served it with. Your kitchen victories make my day!
And if you snap a photo of your beautiful cabbage bread creation, please share it with me! Tag me on social media so I can see it: Instagram and Pinterest. Seeing your take on my recipes is one of the biggest joys of sharing them.
What’s your favorite way to use up extra cabbage? Have you ever baked with vegetables in unexpected ways?
