Welcome to the last chicken thigh recipe you will ever need. If you’re searching for chicken thigh recipes that guarantee unbelievably crispy skin and ridiculously juicy meat every single time, you’ve found it. Forget dry, disappointing chicken for good.
This simple, pan-seared method transforms humble chicken thighs into a show-stopping meal that tastes like it came from a high-end restaurant. It’s fast enough for a busy weeknight but impressive enough for company. Let’s get cooking!
Why This is the Best Chicken Thigh Recipe You’ll Ever Make
We’ve all been there: you follow a recipe, but the skin ends up soggy and the meat is just okay. This recipe is different. It’s designed for maximum flavor and texture with minimal fuss.
- Unbeatable Flavor: Chicken thighs are naturally more flavorful and forgiving than breasts. Searing them in a hot skillet develops a deep, golden-brown crust that is simply irresistible.
- Incredibly Juicy: By starting skin-side down and finishing with a butter baste, we lock in all the natural juices, ensuring every bite is tender and moist.
- Quick & Easy: This entire flavor-packed meal comes together in about 30 minutes, making it a perfect weeknight dinner solution.
- Budget-Friendly: Chicken thighs are one of the most affordable cuts of meat, delivering a huge return on flavor for a low cost.
Key Ingredients for Success
You don’t need a long list of fancy ingredients for this recipe. The magic comes from the technique and a few quality staples.
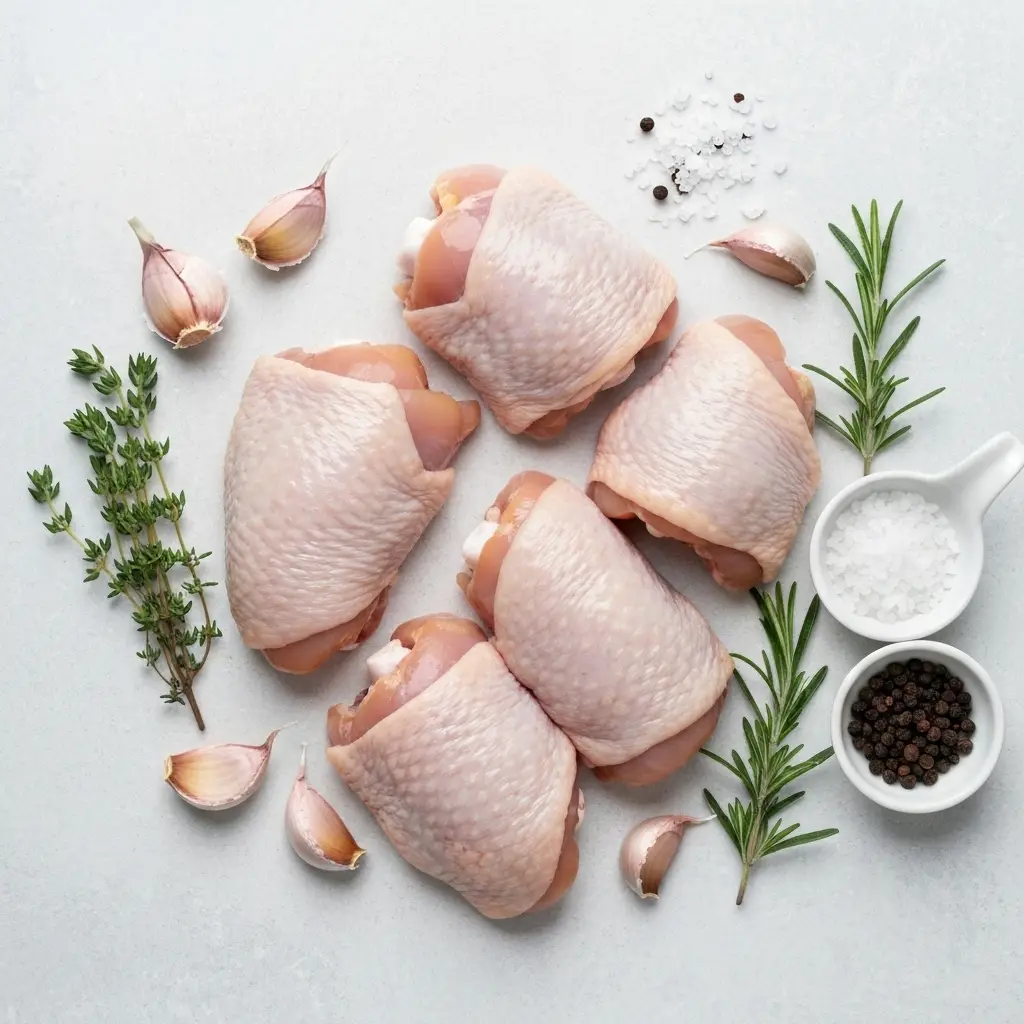
- Chicken Thighs: For the best results, use bone-in, skin-on chicken thighs. The bone adds flavor and helps the meat cook evenly, while the skin is essential for that crispy texture we all crave.
- Olive Oil: A high-quality extra virgin olive oil helps to get the searing process started and prevents sticking.
- Coarse Salt & Black Pepper: Don’t be shy! A generous seasoning of salt is crucial for drawing out moisture from the skin, which is the key to getting it crispy.
- Garlic: Whole, lightly smashed cloves infuse the butter with a sweet, aromatic flavor without burning.
- Fresh Herbs: Hardy herbs like thyme and rosemary stand up well to the heat and complement the chicken beautifully.
- Butter: Finishing the chicken with a butter baste adds richness and helps to brown the skin even further.
Essential Equipment
The most important tool for this recipe is the right pan. A heavy-bottomed skillet that retains heat well is non-negotiable for a perfect sear.
- Cast Iron Skillet: A 10 or 12-inch cast iron skillet is the gold standard. It gets screaming hot and distributes heat evenly, which is critical for crispy skin. A heavy stainless steel skillet is a good alternative.
- Tongs: For safely flipping the chicken without piercing the skin.
- Meat Thermometer: The only way to know for sure when your chicken is perfectly cooked. It takes all the guesswork out of the equation.
How to Make Perfect Pan-Seared Chicken Thighs (Step-by-Step)
Follow these simple steps for a flawless result. The secret is patience—let the pan do the work!
Step 1: Prepare the Chicken
First, take the chicken thighs out of the refrigerator about 20-30 minutes before cooking to let them come to room temperature. This helps them cook more evenly. The most critical step is to pat the skin completely dry with paper towels. I mean bone dry! Moisture is the enemy of crispiness. Season both sides generously with salt and pepper.
Step 2: Sear for Crispy Skin
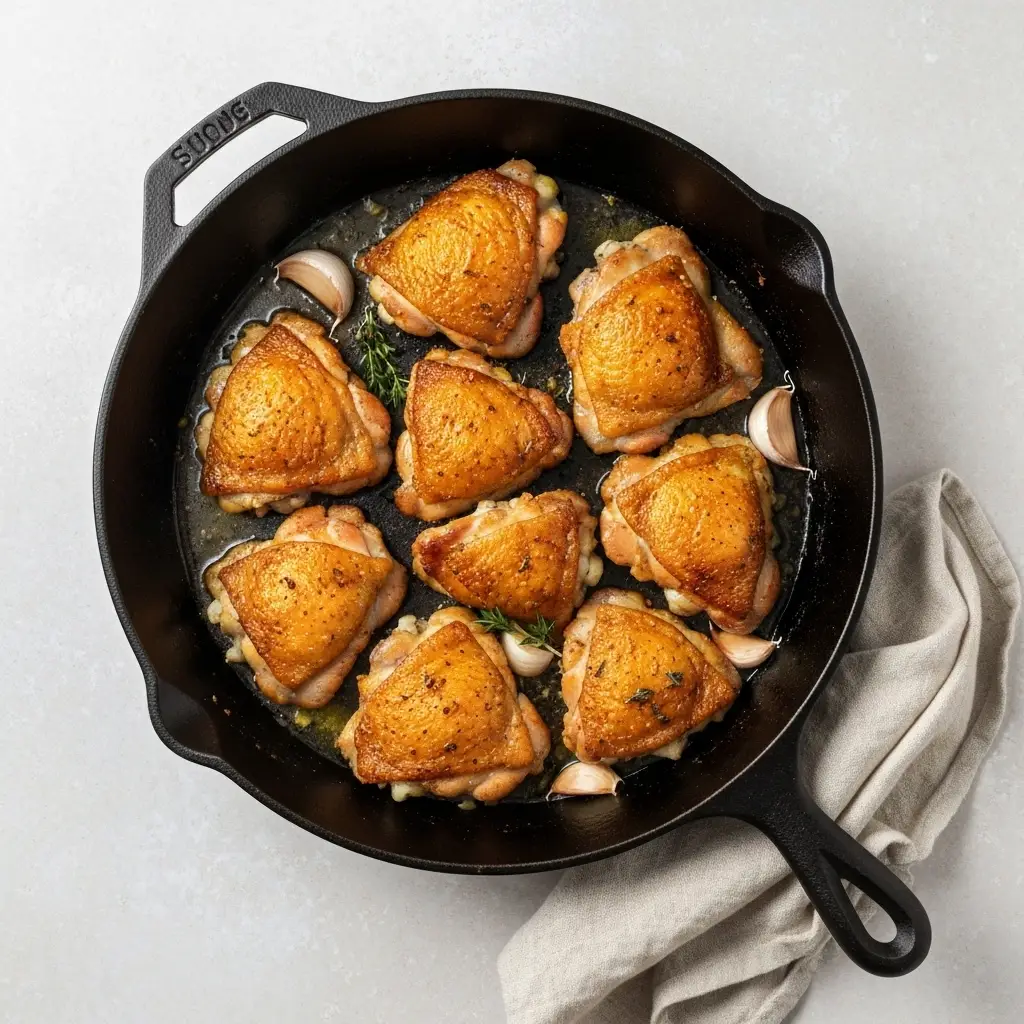
Place your cast iron skillet over medium-high heat and add the olive oil. Once the oil is shimmering (but not smoking), carefully place the chicken thighs in the pan, skin-side down. You should hear a confident sizzle. Do not touch or move them for at least 5-7 minutes. Let the pan create a beautiful, golden-brown crust. Reduce the heat to medium to prevent the skin from burning before the chicken is cooked through.
Step 3: Flip and Add Aromatics
After 10-12 minutes, the skin should be deeply golden brown and release easily from the pan. Flip the chicken thighs over. Now, add the butter, smashed garlic cloves, and fresh herb sprigs to the skillet. As the butter melts, tilt the pan and use a large spoon to baste the chicken with the fragrant, herby butter. Continue to cook for another 10-12 minutes.
Step 4: Finish Cooking & Rest
The chicken is done when a meat thermometer inserted into the thickest part (avoiding the bone) reads 165°F (74°C). Remove the chicken from the skillet and transfer it to a cutting board or plate. Let it rest for 5-10 minutes before serving. This allows the juices to redistribute, ensuring the meat is as moist as possible.
Pro Tips for Juicy, Flavorful Chicken Every Time
These four simple rules will elevate your chicken game from good to great.
| Tip | Why It Works |
|---|---|
| Start with Dry Skin | Moisture creates steam, which prevents the skin from browning and crisping. Patting the thighs completely dry is the most important step for crispy skin. |
| Don’t Crowd the Pan | Give each thigh enough space. Overcrowding lowers the pan’s temperature and steams the chicken instead of searing it. Cook in batches if needed. |
| Use a Meat Thermometer | It’s the only foolproof way to ensure your chicken is cooked to a safe 165°F without overcooking it and drying it out. No more guessing! |
| Always Rest the Meat | Letting the chicken rest for 5-10 minutes before cutting allows the juices to settle back into the meat, resulting in a much juicier final product. |
Recipe Variations to Try
This simple garlic and herb recipe is a fantastic base. Feel free to experiment with other flavor profiles!
- Lemon & Dill: Add fresh lemon slices and dill fronds to the pan instead of thyme and rosemary for a bright, fresh flavor.
- Spicy Paprika: Add 1 teaspoon of smoked paprika and a pinch of cayenne pepper to your salt and pepper seasoning for a smoky, spicy kick.
- Honey Soy Glaze: In the last few minutes of cooking, add a splash of soy sauce and a drizzle of honey to the pan to create a quick, savory-sweet glaze. Just be sure to check out our dedicated teriyaki chicken recipe for more ideas!
What to Serve with Crispy Chicken Thighs
These versatile chicken thighs pair well with almost anything. For a complete meal, try serving them with roasted potatoes, creamy polenta, or a simple side of steamed green beans or a fresh arugula salad. They’re also fantastic alongside our classic chicken alfredo pasta if you’re feeling indulgent.
Storage, Reheating, and Meal Prep
Store leftover chicken in an airtight container in the refrigerator for up to 4 days. The skin will lose its crispiness upon refrigeration. To reheat and bring back some of the crunch, place the chicken in a 400°F (200°C) oven or an air fryer for 5-10 minutes until warmed through. This method is far superior to the microwave.
This is also a great recipe for meal prep. Cook a batch on Sunday and enjoy it in salads, wraps, or grain bowls throughout the week. For other great make-ahead ideas, check out our simple shredded chicken recipe.
The Perfect Garlic Herb Chicken Thighs
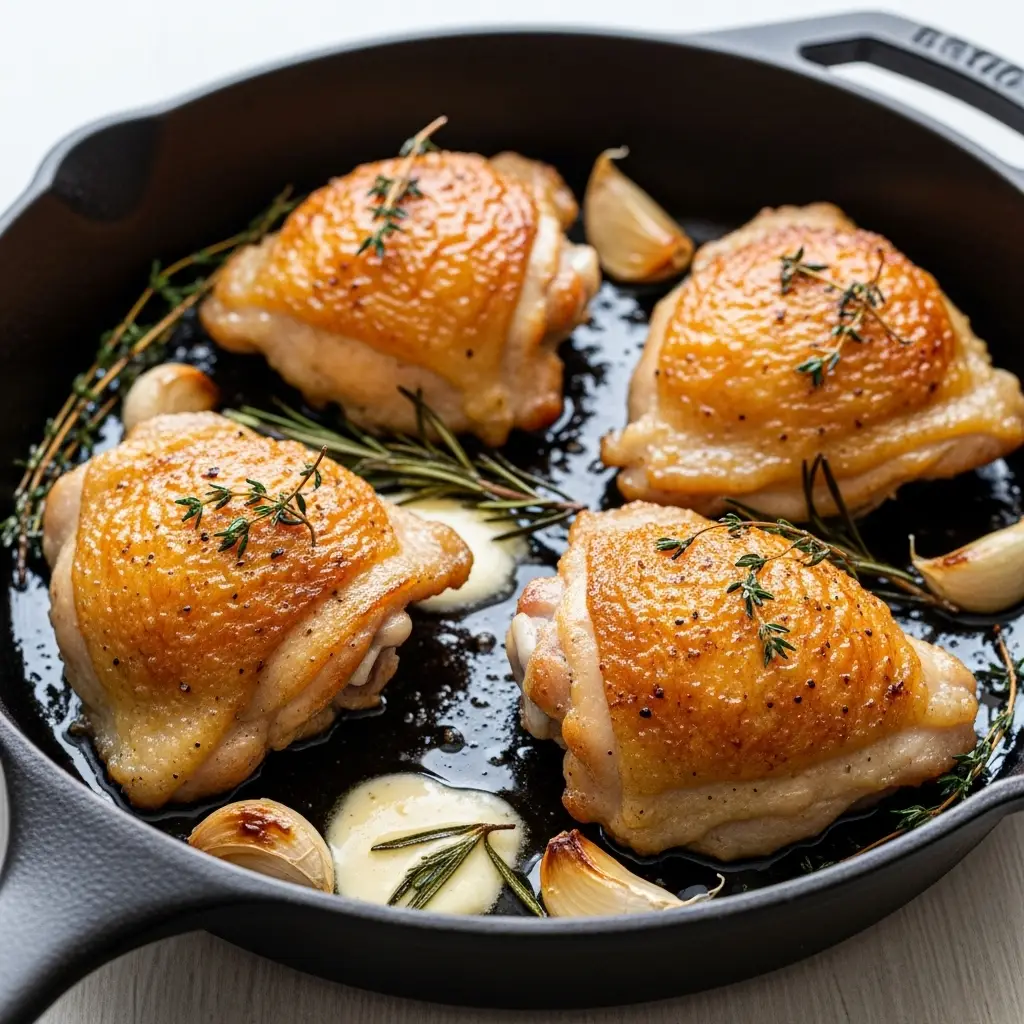
Chicken Thigh Recipes: The Ultimate Crispy Skillet Method
Ingredients
Equipment
Method
- Remove chicken from the fridge 20-30 minutes before cooking. Pat the skin completely dry with paper towels. Season all over generously with salt and pepper.
- Heat olive oil in a large cast-iron skillet over medium-high heat. Place chicken thighs skin-side down in the hot skillet. Cook without moving for 10-12 minutes, reducing heat to medium after a few minutes, until the skin is deeply golden brown and crisp.
- Flip the chicken. Add the butter, smashed garlic cloves, and fresh herbs to the pan. As the butter melts, tilt the pan and spoon the butter over the chicken continuously for 1 minute.
- Continue to cook for another 10-12 minutes on the second side, or until an instant-read thermometer inserted into the thickest part of the thigh (not touching bone) registers 165°F (74°C).
- Remove the chicken from the skillet and let it rest on a plate or cutting board for 5-10 minutes before serving. This allows the juices to redistribute for a moister result.
Nutrition
Notes
Don't Crowd the Pan: Cook in two batches if your skillet isn't large enough to hold the thighs in a single layer without touching.
Tried this recipe?
Let us know how it was!Frequently Asked Questions
Chicken thighs are safe to eat when they reach an internal temperature of 165°F (74°C). However, because they have more connective tissue, many chefs prefer to cook them to 175-185°F (80-85°C) for the most tender result. Always use a meat thermometer inserted into the thickest part of the thigh, avoiding the bone.
For this pan-seared recipe, we strongly recommend bone-in, skin-on chicken thighs. The skin is essential for getting that crispy texture, and the bone adds immense flavor and helps prevent the meat from drying out during cooking.
The number one secret is to start with completely dry skin. Pat the chicken thighs thoroughly with paper towels before seasoning. Secondly, place them skin-side down in a hot, but not smoking, skillet and do not move them for at least 10-12 minutes to allow a deep crust to form.
Yes, you can adapt this recipe for the oven. Sear the chicken skin-side down in an oven-safe skillet on the stovetop for 5-7 minutes. Then, flip the chicken and transfer the entire skillet to a preheated 400°F (200°C) oven for 15-20 minutes, or until the chicken reaches 165°F.
Store leftovers in an airtight container in the fridge for up to 4 days. To reheat and revive the crispy skin, use an air fryer at 375°F for 5-8 minutes or a conventional oven at 400°F for 10-15 minutes. Avoid the microwave, as it will make the skin soggy.
More Delicious Chicken Dinners
And there you have it—the ultimate guide to perfect, crispy, and juicy chicken thighs every single time. This is one of those foundational chicken thigh recipes that will become a go-to in your kitchen. We know your family will love it!
If you make this recipe, please leave a comment below and let us know how it turned out! And don’t forget to save it to your favorite board on Pinterest!
