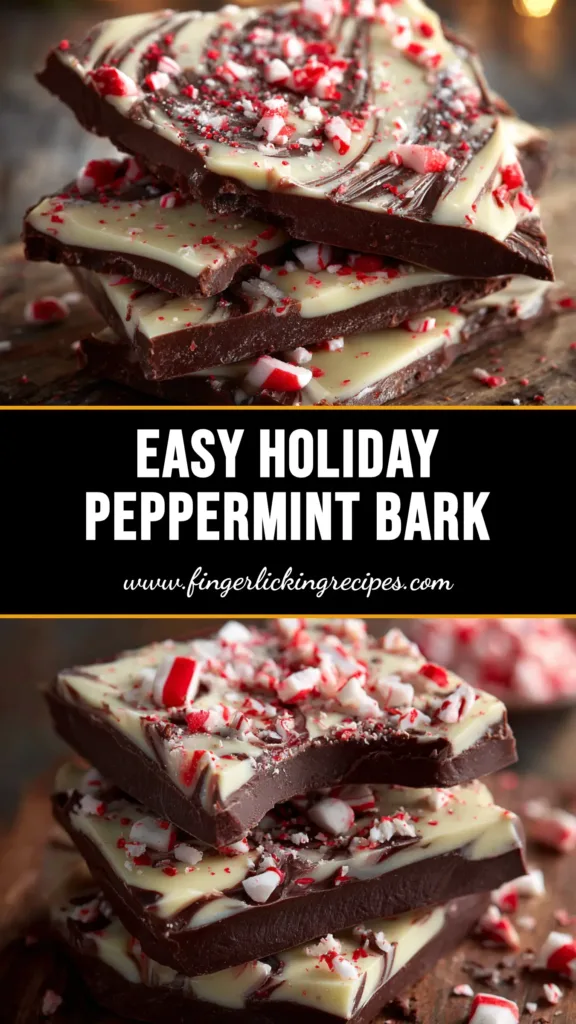
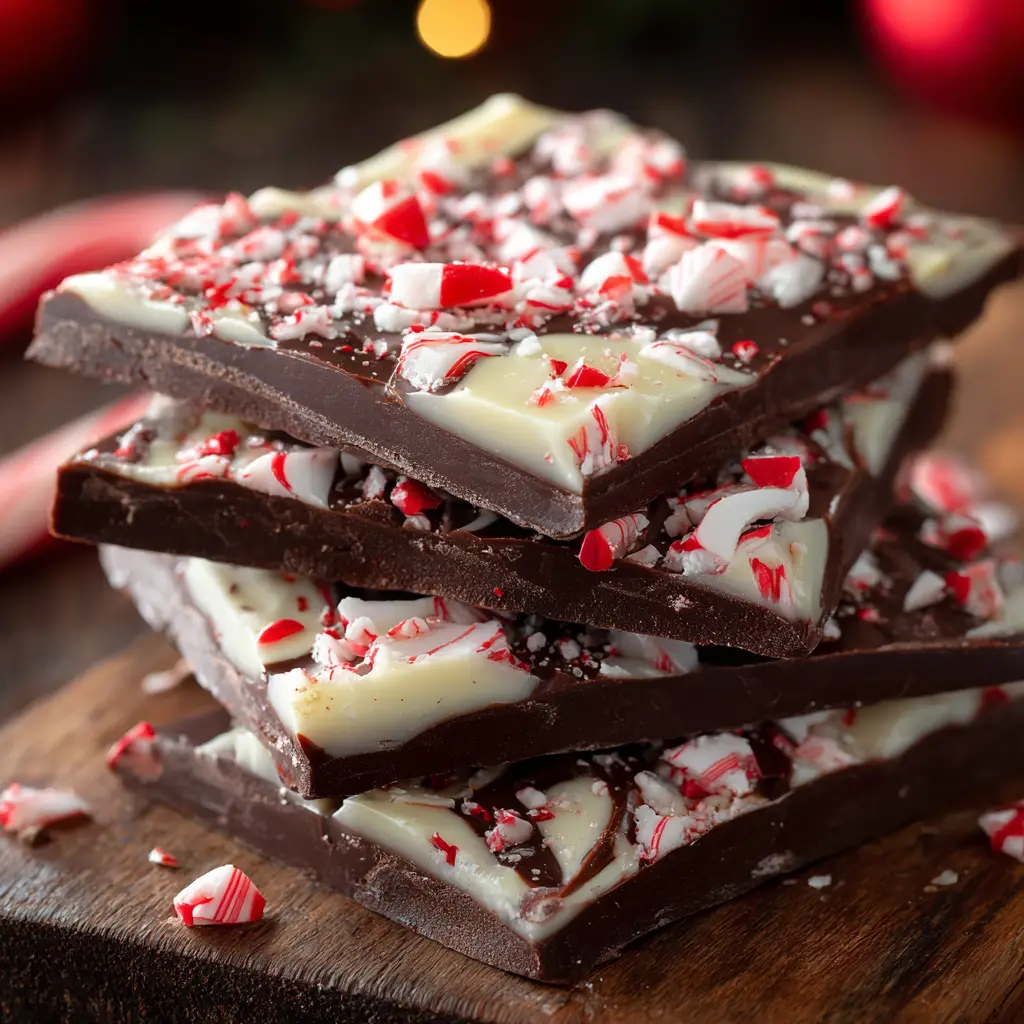
Welcome to your new favorite holiday tradition! This easy Chocolate Peppermint Bark Recipe is a classic for a reason. With just a few simple ingredients, you can create a beautiful and delicious treat that’s perfect for gifting, sharing at parties, or enjoying on a cozy winter night. We’ve perfected this recipe to ensure you get clean, distinct layers of rich dark chocolate and creamy white chocolate, all topped with a festive crunch of peppermint candy canes. Forget the store-bought versions; this homemade bark is infinitely better and surprisingly simple to make.
Why This is the Best Chocolate Peppermint Bark Recipe
We’re aiming for perfection in every bite. This recipe isn’t just about melting chocolate; it’s about the technique that prevents the layers from separating and achieves that satisfying snap. Here’s why you’ll love it:
- It’s Foolproof: Our step-by-step guide makes it easy for even beginner cooks to master.
- Perfectly Distinct Layers: We share the secret to preventing the white and dark chocolate from mixing, ensuring a beautiful presentation.
- Incredibly Festive: It’s the quintessential Christmas candy, adding a touch of homemade charm to any holiday spread. Looking for more festive treats? Our Christmas Sugar Cookies are another holiday staple you won’t want to miss.
- Versatile and Giftable: Pack it in tins or bags for a thoughtful and delicious gift that everyone will appreciate.
Ingredients You’ll Need
The key to a great Chocolate Peppermint Bark Recipe is using high-quality ingredients. You only need four things, so make them count!
- Good Quality Dark or Semi-Sweet Chocolate: This forms our rich, decadent base. Choose a brand you enjoy eating on its own.
- Good Quality White Chocolate: This creates the creamy top layer. Avoid white chocolate chips, as they often contain stabilizers that prevent smooth melting.
- Peppermint Extract: Just a touch infuses the white chocolate layer with a crisp, cool peppermint flavor.
- Candy Canes or Peppermint Candies: These provide the essential crunch and festive color on top.
Step-by-Step Instructions
Follow these simple steps to create your own stunning peppermint bark. The process is quick, with most of the time spent waiting for the layers to set.
Melting the Chocolate Layers
- Prepare Your Pan: Line a baking sheet with parchment paper. This is crucial for easy removal later.
- Melt the Dark Chocolate: Using a double boiler or the microwave, melt the dark chocolate until smooth. If using the microwave, heat in 30-second intervals, stirring in between to prevent scorching.
- Spread the First Layer: Pour the melted dark chocolate onto the prepared baking sheet. Use a spatula to spread it into a thin, even layer. Let this layer set at room temperature for about 20-30 minutes, or until just firm.
Assembling the Bark
- Melt the White Chocolate: While the dark chocolate sets, melt the white chocolate using the same method. Be extra careful, as white chocolate can seize more easily.
- Add Peppermint: Once the white chocolate is smooth, stir in the peppermint extract.
- Spread the Second Layer: Pour the white chocolate mixture over the set dark chocolate layer, spreading it evenly.
- Add the Topping: Immediately sprinkle the crushed candy canes over the top. Gently press them into the white chocolate so they adhere as it sets.

Pro Tips for Perfect Peppermint Bark
Unlock the secrets to making bark that looks as good as it tastes. These tips will help you avoid common pitfalls like separating layers or a dull finish.
Choosing Your Chocolate
The type of chocolate you use makes all the difference. For the best flavor and texture, opt for chocolate bars or wafers (callets) instead of chocolate chips. Chips often contain less cocoa butter and more stabilizers, which can result in a thick, less-than-silky texture when melted.
The Secret to Distinct Layers
The most common issue with homemade chocolate peppermint bark is the layers separating. The trick is to pour the white chocolate layer on when the dark chocolate is set but not fully hardened. It should be firm to the touch but still slightly tacky. This helps the two layers adhere perfectly. If you’re looking for another simple yet impressive dessert, try this delicious peanut butter pie recipe.
Fun Variations to Try
While the classic is fantastic, feel free to get creative! Here are a few ideas to customize your bark:
- Swirled Bark: Before the layers set, use a toothpick or skewer to gently swirl the white and dark chocolate together for a beautiful marbled effect.
- Extra Toppings: Add a sprinkle of festive sprinkles, mini chocolate chips, or a drizzle of a third type of chocolate (like milk chocolate) on top.
- Different Extracts: Try swapping the peppermint extract for orange or raspberry extract for a unique flavor combination. For a cozy drink to go with your treat, check out this Nutella coffee recipe.
How to Store and Gift Your Bark
Proper storage is key to keeping your peppermint bark fresh and snappy.
- Storage: Store the bark in an airtight container at room temperature for up to two weeks. Avoid refrigerating it, as condensation can make the candy canes sticky and the chocolate may bloom (develop a white, chalky coating).
- Gifting: Break the bark into irregular pieces and place them in decorative tins, cellophane bags tied with a ribbon, or mason jars. It’s a simple, elegant gift that’s always a huge hit during the holidays.
Frequently Asked Questions
The layers separate if the first chocolate layer is too hard and cold before you add the second. To prevent this, pour the white chocolate layer on when the dark chocolate is firm to the touch but still slightly tacky. This helps the two layers adhere perfectly.
For the best texture and flavor, use high-quality chocolate bars or wafers (often called callets). Avoid chocolate chips, as they contain stabilizers that can prevent them from melting into a smooth, fluid consistency.
Store your peppermint bark in an airtight container in a cool, dry place at room temperature. It will last for up to two weeks. Avoid the refrigerator, as condensation can make the candy cane pieces sticky.
You can, but you must be very careful. Peppermint oil is significantly more potent than extract. You would only need a few drops. Start with 1-2 drops, stir it in, and taste before adding more.
You can make it up to two weeks in advance. Just be sure to store it properly in an airtight container at room temperature so it stays fresh and snappy until you’re ready to package and gift it.
More Holiday Recipes You’ll Love
Expand your holiday baking repertoire with some of our other festive favorites. From cookies to candies, we have everything you need for a sweet celebration.
Chocolate Peppermint Bark Recipe

Chocolate Peppermint Bark Recipe (Easy & Foolproof)
Ingredients
Equipment
Method
- Line a baking sheet with parchment paper for easy removal.
- In a microwave-safe bowl or double boiler, melt the semi-sweet chocolate until completely smooth. Pour onto the prepared baking sheet and spread into a thin, even layer.
- Let the dark chocolate layer set at room temperature for 20-30 minutes, until it's firm to the touch but not fully hardened.
- While the first layer sets, melt the white chocolate until smooth. Stir in the peppermint extract.
- Pour the peppermint white chocolate over the set dark chocolate layer and spread evenly.
- Immediately sprinkle the crushed candy canes over the top, gently pressing them into the white chocolate.
- Allow the bark to set completely at room temperature for at least 2 hours, or in the refrigerator for 30 minutes. Once fully hardened, break it into pieces. Enjoy!
Nutrition
Notes
Layering Tip: Ensure the dark chocolate layer is just set (not fully hard) before adding the white chocolate layer to help them stick together.
Storage: Store in an airtight container at room temperature for up to 2 weeks.
Tried this recipe?
Let us know how it was!Share Your Creations!
We hope you love this easy Chocolate Peppermint Bark Recipe! It’s a true holiday classic that brings so much joy with so little effort. If you make it, be sure to leave a comment below and let us know how it turned out. Don’t forget to save this recipe to your favorite holiday board on Pinterest!
