Forget everything you know about mushy, underwhelming diner food. This is the ultimate Corned Beef Hash recipe that delivers a perfectly crisp, golden-brown crust and a tender, savory interior every single time. We’re unlocking the secrets to a breakfast classic that will become a staple in your kitchen, whether you’re using leftover corned beef or starting from scratch.
This dish is the perfect way to transform leftovers into a hearty, satisfying meal. It’s a simple combination of salty corned beef, fluffy potatoes, and savory onions, all fried to perfection. Get ready to master this iconic comfort food.
Why This Is The Best Corned Beef Hash Recipe
There are countless recipes out there, but this one is meticulously designed for success. We focus on the technique that creates that signature crispy texture without fail. It’s not just about the ingredients; it’s about how you cook them.
Maximum Crispiness: We use a specific method—patience is key!—to ensure a deep, golden crust forms on the potatoes and beef.
Incredibly Flavorful: Simple, high-quality ingredients are all you need. The savory beef, sweet onions, and earthy potatoes meld together perfectly.
Versatile and Simple: Perfect for using St. Patrick’s Day leftovers, but just as delicious with quality canned corned beef. It’s a true one-pan wonder. If you enjoy one-pan meals, you’ll love this One-Pan Balsamic Chicken for dinner.
Ingredients You’ll Need
The beauty of this recipe lies in its simplicity. You don’t need a long list of fancy ingredients to create a spectacular meal.
For the Hash:
Cooked Corned Beef: The star of the show. Leftover brisket is fantastic, but a good quality canned version also works wonders.
Potatoes: Russet or Yukon Gold potatoes are your best bet. They hold their shape well and crisp up beautifully.
Onion: A yellow or white onion provides the essential aromatic, savory backbone.
Fat: Unsalted butter and a neutral oil (like canola or vegetable) create the perfect combination for flavor and a high smoke point for crisping.
Seasoning: Freshly ground black pepper and a touch of Worcestershire sauce for depth. Use salt sparingly, as the corned beef is already salty.
Fresh Parsley: Adds a touch of freshness and color at the end.
For Serving (Optional):
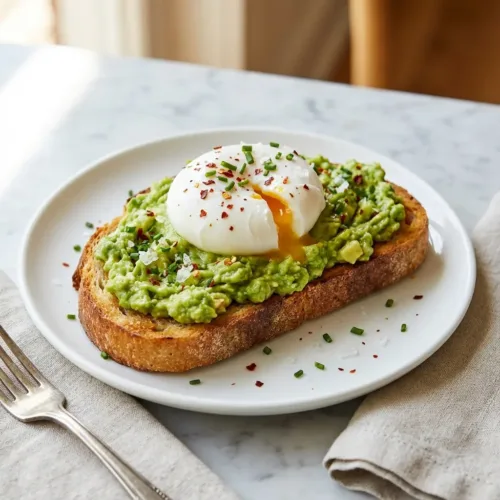
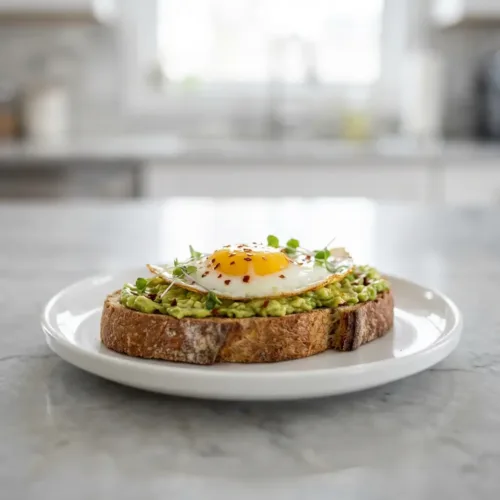
Eggs: Fried or poached eggs with a runny yolk are the classic pairing.
Toast: A hearty slice of rye or sourdough toast is perfect for sopping up the yolk.
How to Make Corned Beef Hash Step-by-Step
Follow these steps closely for a foolproof, crispy result. The secret is to resist the urge to stir too often. Let the hash form a crust in the pan.
Prepare the Ingredients: Dice your cooked corned beef, potatoes, and onion into a uniform 1/4 to 1/2-inch dice. Keeping everything the same size is crucial for even cooking. If using raw potatoes, parboil them for 5-7 minutes until just tender, then drain and cool completely.
Sauté the Aromatics: Heat a large cast-iron or non-stick skillet over medium-high heat. Add a tablespoon of oil and the diced onion. Cook, stirring occasionally, until softened and lightly golden, about 5 minutes.
Combine and Press: Add the diced potatoes and corned beef to the skillet. Gently mix everything together with the onions. Add the butter, Worcestershire sauce, and black pepper. Now, use a spatula to press the mixture down firmly into an even layer.
That perfect contrast of a crispy outside and a tender inside.
The Patient Crisp: This is the most important step. Reduce the heat to medium and let the hash cook, undisturbed, for 7-9 minutes. Do not stir it. You want a deep, golden-brown crust to form on the bottom. You can peek at a corner to check its progress.
Flip and Finish: Once the bottom is crispy, use a large spatula to flip the hash in sections. Don’t worry about flipping it all in one perfect piece. Press it down again lightly and cook for another 5-7 minutes until the second side is also browned and crispy.
Serve Immediately: Remove from heat, stir in fresh parsley, and serve your delicious, crispy Corned Beef Hash hot. Top with a fried egg for the ultimate breakfast experience.
Expert Tips for the Crispiest Hash
Achieving that perfect crust is an art, but these tips will make you a master.
Don’t Crowd the Pan
Use a large skillet, preferably cast iron, to give the ingredients enough space. If you overcrowd the pan, the ingredients will steam instead of fry, resulting in a mushy hash. A 12-inch skillet is ideal for this recipe.
The Secret is Patience (Don’t Stir!)
The biggest mistake people make is stirring the hash too often. You must let it sit and form a crust. Trust the process and let the heat do its work. This is the single most important tip for crispy Corned Beef Hash.
Patience is key! Press the hash down and let it form a beautiful golden crust.
Get the Fat Right
Using a combination of butter and oil gives you the best of both worlds. Butter provides rich flavor, while the oil’s higher smoke point prevents the butter from burning and helps achieve a better crust.
Delicious Variations to Try
While the classic recipe is fantastic, feel free to customize it. For another customizable breakfast, try our go-to fluffy pancake recipe.
Add Veggies: Sauté some diced red or green bell peppers along with the onions for extra color and flavor.
Spice it Up: Add a pinch of red pepper flakes or a dash of your favorite hot sauce for a spicy kick.
Herbaceous Twist: Mix in other fresh herbs like thyme or chives along with the parsley.
Sweet Potato Swap: For a different flavor profile, try using sweet potatoes instead of regular potatoes. It pairs wonderfully with the salty corned beef.
Storing and Reheating Leftovers
Corned beef hash is almost as good the next day. Store leftovers in an airtight container in the refrigerator for up to 3 days.
To reheat and maintain crispiness, avoid the microwave. The best way is to pan-fry it in a skillet over medium heat with a little oil or butter until heated through and re-crisped on the bottom.
Mushiness usually comes from too much moisture and not enough heat. This can happen if you overcrowd the pan, don’t use enough fat, or if your boiled potatoes are still wet. Ensure your ingredients are dry and your pan is hot!
Starchy or all-purpose potatoes like Russets or Yukon Golds are best. They become fluffy on the inside while crisping up nicely on the outside. Avoid waxy potatoes, which can become gummy.
Absolutely! This recipe works perfectly with a good quality canned corned beef. Just be sure to drain it well and gently break it up before dicing and adding it to the pan.
The key is to press the hash into a single layer in a hot, well-oiled skillet (cast iron is best) and let it cook undisturbed for 7-9 minutes. Don’t stir it! This allows a delicious crust to form on the bottom.
The classic pairing is a fried or poached egg with a runny yolk on top. It’s also delicious with a side of toast, a simple green salad, or some sliced avocado.
More Breakfast & Brunch Favorites
If you loved this recipe, explore some of our other morning delights. For a taste of the Mediterranean, try our Mediterranean Chicken Bowls, which work for any meal of the day.
FL Recipes
Corned Beef Hash: The Ultimate Recipe for a Crispy, Flavorful Breakfast
Learn how to make the best homemade Corned Beef Hash with this easy recipe. Get all the tips and tricks for a perfectly crispy, non-mushy hash using leftover or canned corned beef. A classic breakfast skillet!
1lbcooked corned beefabout 3 cups, diced into 1/2-inch pieces
1.5lbsRusset or Yukon Gold potatoespeeled and diced into 1/2-inch pieces
1large yellow oniondiced
1tbspunsalted butter
2tbspneutral oillike canola or vegetable oil, divided
1tspWorcestershire sauce
1/2tspfreshly ground black pepper
2tbspfresh parsleychopped, for garnish
4large eggsfor serving (optional)
Equipment
1 Large Skillet (12-inch, cast iron preferred)
1 Spatula
1 Knife and Cutting Board
Method
Prepare the ingredients: Dice your cooked corned beef, potatoes, and onion into a uniform 1/2-inch dice. If using raw potatoes, place diced potatoes in a pot of cold salted water, bring to a boil, and cook for 5-7 minutes until just fork-tender. Drain well and let them cool slightly.
Heat a large 12-inch cast-iron or non-stick skillet over medium-high heat. Add 1 tablespoon of oil. Once shimmering, add the diced onion and cook, stirring occasionally, until softened, about 5 minutes.
Add the remaining 1 tablespoon of oil, the diced potatoes, and the corned beef to the skillet. Gently mix everything together. Add the butter, Worcestershire sauce, and black pepper. Stir to combine.
Using a spatula, press the mixture down firmly and evenly across the bottom of the pan.
Reduce heat to medium and cook, undisturbed, for 7-9 minutes. Allow a deep, golden-brown crust to form on the bottom before touching it.
Use a wide spatula to flip the hash in large sections. Press it down gently again and cook for another 5-7 minutes, or until the other side is browned and crispy.
Stir in the fresh parsley. Serve hot, topped with a fried or poached egg if desired.
Nutrition
Calories: 520kcalProtein: 28gFat: 30gFiber: 5g
Notes
Tip 1: Dry potatoes are key! After parboiling, make sure your potatoes are very dry. Pat them with a paper towel if needed. Moisture is the enemy of a crispy hash. Tip 2: Don't skip the cast iron. A cast-iron skillet retains heat exceptionally well, which is essential for creating that perfect, even crust. Tip 3: Season to taste at the end. Corned beef is already very salty, so it's best to taste the finished hash before adding any extra salt.
Did you make this Corned Beef Hash recipe? We want to see it! Leave a comment below with your thoughts or share your beautiful creation on Pinterest. Your feedback helps our community of home cooks grow.
The secret to the perfect breakfast is right here: our foolproof crispy corned beef hash.
Hi, I’m Emily Carter, and welcome to FL Recipes! I share simple, healthy recipes that make cooking easy, fun, and delicious for everyone. more about me »


")


")