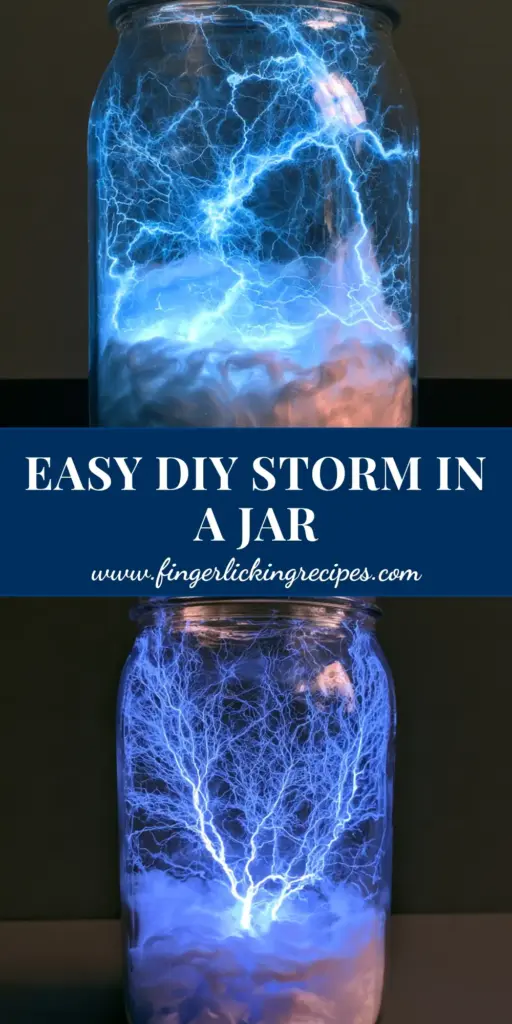
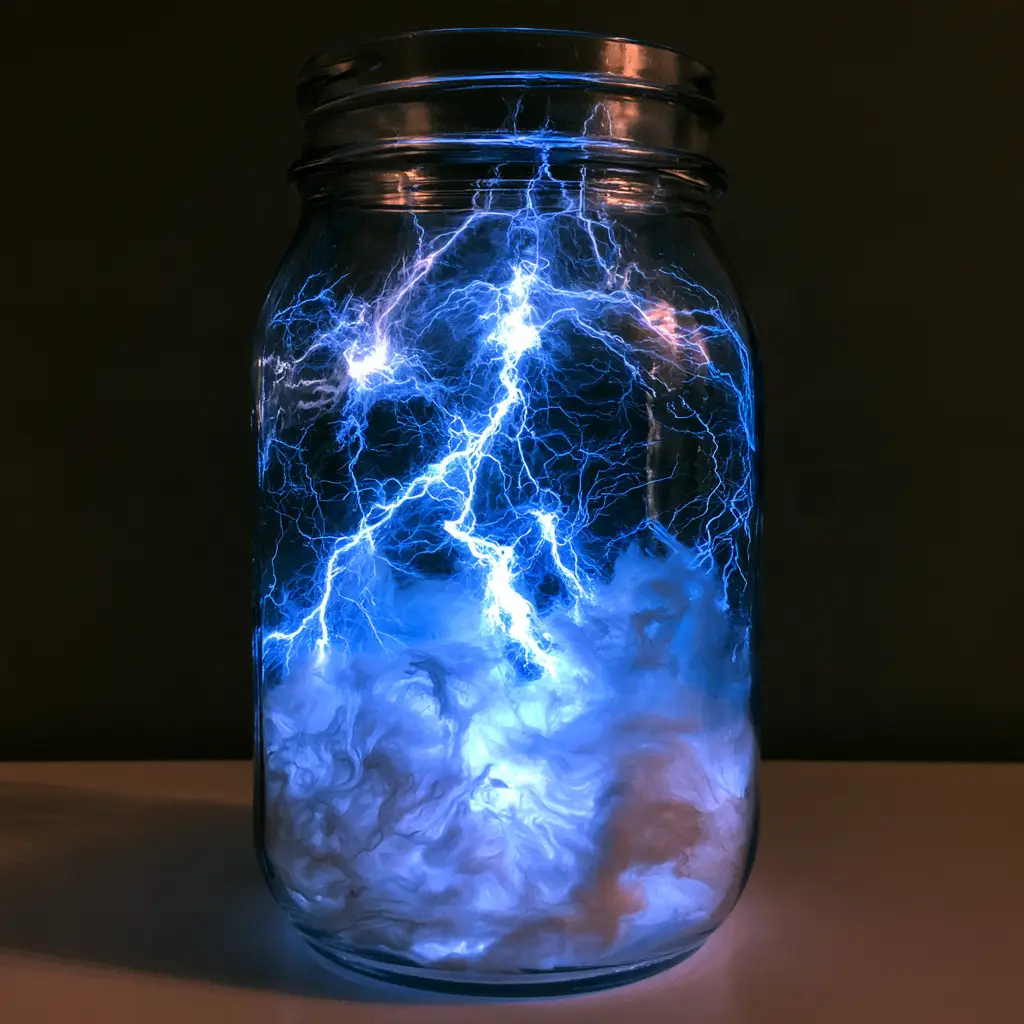
The Static Electricity Storm in a Jar is the ultimate viral “recipe” for an atmospheric evening. If you have ever wanted to capture the raw, jagged energy of a midnight thunderstorm and place it right on your kitchen island, this project is for you. This isn’t just a craft; it is a visual feast that mimics the electric blue plasma filaments and bright white light streaks of a high-altitude lightning cell, all contained within a standard cylindrical glass mason jar.
When you are hosting a themed dinner and serving up something vibrant like my cotton-candy-cookies, you need a centerpiece that matches that whimsical energy. This “storm” creates a stunning contrast between the soft, cloud-like texture of white filler and the sharp, energetic glow of internal lighting. It is a guaranteed conversation starter for any home cook looking to level up their table aesthetic.
Why This Static Electricity Storm in a Jar Works for Your Next Party
- Forensic Visual Texture: The contrast between the dense, wispy white polyester fiberfill and the sharp, branching blue light creates a professional “plasma” effect.
- Maximum Pinterest Appeal: This project is designed to be photographed. The internal blue glow against a matte black background creates high-click-through visual drama.
- Quick Assembly: Unlike a complex 48-hour brine, this “visual recipe” takes less than 15 minutes to assemble but lasts for weeks as decor.
- Versatile Mood Lighting: Perfect for late-night snacking or as a companion to a cozy bowl of mexican-street-corn-chowder on a rainy evening.
Essential Components for Your Storm Jar “Recipe”
To create a Static Electricity Storm in a Jar, you need specific “ingredients” that mimic meteorological phenomena. Each element serves a culinary-adjacent purpose in building the final “dish.”
- 1 32-ounce (946ml) Clear Glass Mason Jar: This is your vessel. Use a standard cylindrical jar with a threaded rim to ensure the light is contained and the “storm” feels trapped and energetic.
- 2 cups (approx. 50g) White Polyester Fiberfill: This acts as your “cloud base.” It provides a soft, wispy texture that catches and diffuses the light, creating that dense, foggy atmosphere.
- 1 set Electric Blue Plasma Filaments (LED Fairy Lights or Neon Wire): These represent the jagged and energetic lightning strikes. The blue hue provides the primary light source for the jar.
- 1 set Bright White Light Streaks (Micro LED): These add “hot spots” to the storm, simulating the core of a lightning bolt.
- Matte Black Backdrop: While not part of the jar, this is essential for the “plating” of your storm, ensuring the blue glow pops.
Step-By-Step Assembly: Crafting the Perfect Plasma Storm
Preparing the Glass Vessel
Start with a pristine clear glass mason jar. Ensure there are no water spots or fingerprints on the interior, as these will be highlighted by the electric blue plasma filaments. Wash the jar in hot soapy water and dry thoroughly with a lint-free cloth.
This attention to detail is just as important as prepping your pans for parmesan-potato-rounds. A clean vessel ensures the bright white light streaks remain sharp and jagged rather than blurry and diffused.
Building the Cloud Foundation
Take your white polyester fiberfill and begin packing it into the bottom of the jar. You want the base foundation to be dense and opaque. This hides the battery pack or power source for your lights.
Pack the first 2 inches (5cm) firmly. As you move toward the center of the jar, start pulling the fibers apart to create a more wispy, cloud-like texture. This variation in density allows the light to “weave” through the fibers, just like a real storm system moving through the atmosphere.
Weaving the Electric Blue Filaments
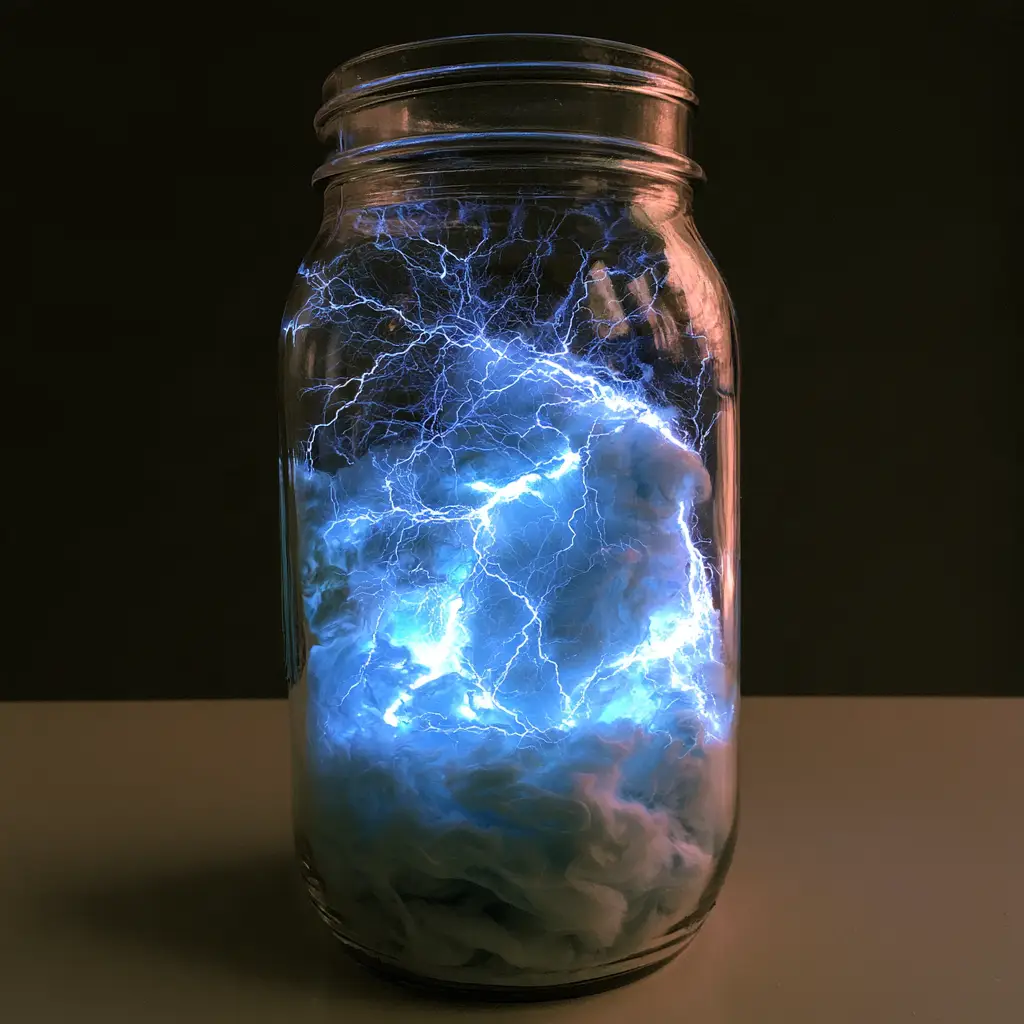
Now, it is time for the “main course.” Take your electric blue plasma filaments and begin threading them through the fiberfill. Do not simply drop them in; use a skewer or a long spoon to push the lights into the center of the fluff.
Visual Cue: You are looking for sharp, branching filaments. Try to keep some of the light strands close to the glass walls and others buried deep in the fibers. This creates a 3D effect where the light appears to be “jumping” from cloud to cloud.
Adding the High-Intensity White Streaks
To finish the Static Electricity Storm in a Jar, weave in the bright white light streaks. These should be fewer in number than the blue lights. Aim for a ratio of 1 white light for every 5 blue lights. This mimics the core intensity of a lightning strike.
Ensure these white lights are placed in the “wispy” areas of the fiberfill. The contrast between the soft white fluff and the jagged, energetic light is what makes this project look like a professional handheld smartphone photo rather than a cheap craft.
Expert Tips for a Professional-Grade Storm
- Fiber Density Matters: If the jar looks too “flat,” pull some of the fiberfill out and tease it with your fingers to create more air pockets. This makes the electric blue plasma filaments appear to float.
- The Black Background Hack: For the best Pinterest-worthy photos, always display your Static Electricity Storm in a Jar against a solid, neutral matte black background. This absorbs the exterior daylight and lets the internal glow shine.
- Light Flickering: If your LED lights have a “twinkle” or “pulse” setting, use it! A slow pulse makes the storm feel alive and “static.”
- Safety First: Only use LED lights that do not generate heat. Since polyester fiberfill is flammable, “cold” lights are a must for this kitchen science project.
Thematic Pairings: What to Serve With Your Storm
Since this jar creates a cool, electric vibe, it pairs beautifully with high-contrast comfort foods. Imagine the blue glow of the jar reflecting off a warm bowl of chicken-pozole-verde or the golden crust of a copycat-costco-chicken-bake.
If you are doing a full “Science in the Kitchen” night, start with this jar, move to a rain-cloud-in-a-jar experiment for the kids, and finish with glow-in-the-dark-rice-krispies-treats.
Frequently Asked Questions
Yes, as long as you use battery-operated LED lights. LEDs are ‘cold’ light sources that do not generate enough heat to ignite the polyester fiberfill.
While real static can be generated, it is momentary. Using blue LED filaments provides a constant, safe, and controllable ‘storm’ effect for decor purposes.
Use a mixture of vinegar and water to remove all streaks and fingerprints, ensuring the light filaments stay sharp and branching in your photos.
Depending on the LED quality, standard coin-cell or AA batteries will power the storm for 24-48 hours of continuous glow.
You can, but polyester fiberfill is superior for its ‘wispy’ and translucent properties, which catch the blue plasma light more effectively than dense cotton.
Static Electricity Storm in a Jar Assembly Card
Share Your Storm!
I want to see how your Static Electricity Storm in a Jar turned out! Did you use extra bright white light streaks? Or maybe you went for a deeper purple-blue plasma look? Please save this “recipe” to your favorite Pinterest DIY board and follow me for more kitchen-adjacent science projects!
If you made this, leave a 5-star rating on the card above and upload a photo in the comments below. Nothing makes me happier than seeing your glowing creations lighting up your homes!