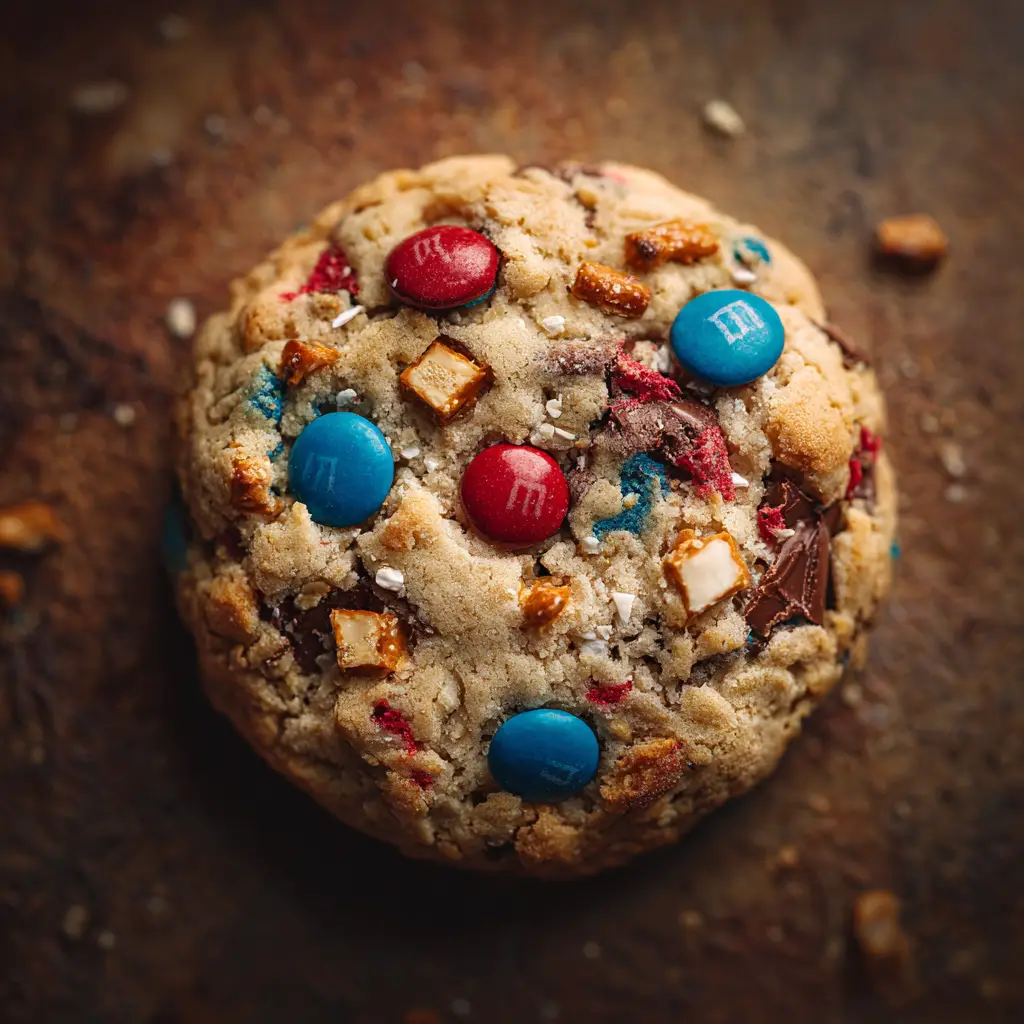
Get ready to raid your pantry and create the most unforgettable holiday treat! These Christmas Kitchen Sink Cookies are the ultimate celebration of sweet, salty, and festive flavors, all packed into one perfectly chewy cookie. If you love a cookie that’s loaded with texture and surprises in every bite, you’ve come to the right place. They are the perfect, easy-to-make dessert for holiday parties, cookie exchanges, or simply enjoying with a cup of hot cocoa.
This recipe isn’t just about making cookies; it’s about creating a new holiday tradition. It’s wonderfully adaptable, incredibly delicious, and a fantastic way to use up leftover holiday candies and snacks. Let’s get baking!
Why You’ll Love These Christmas Kitchen Sink Cookies
If you need a go-to holiday cookie recipe, this is it. These cookies are a guaranteed crowd-pleaser and ridiculously easy to whip up, even for beginner bakers.
- Perfectly Balanced: They master the irresistible combination of sweet and salty with ingredients like chocolate chips and crunchy pretzels.
- Incredibly Customizable: Clean out your pantry! This recipe is a fantastic base for all sorts of mix-ins like candy, nuts, and chips.
- Amazingly Chewy: We’ll share the secret to a soft and chewy texture that lasts for days.
- Super Festive: With holiday-colored M&Ms and sprinkles, these cookies look as good as they taste and are perfect for Christmas gatherings. They would be a wonderful addition to a dessert table featuring a showstopper like a Neapolitan Layer Cake.
What Are Kitchen Sink Cookies?
The name says it all! “Kitchen Sink Cookies” get their name from the idea that you can throw in “everything but the kitchen sink.” They are the ultimate pantry-raid cookie, combining a classic buttery cookie dough with a wild assortment of mix-ins. The key is a delightful contrast of flavors and textures—salty, sweet, crunchy, and chewy all at once.
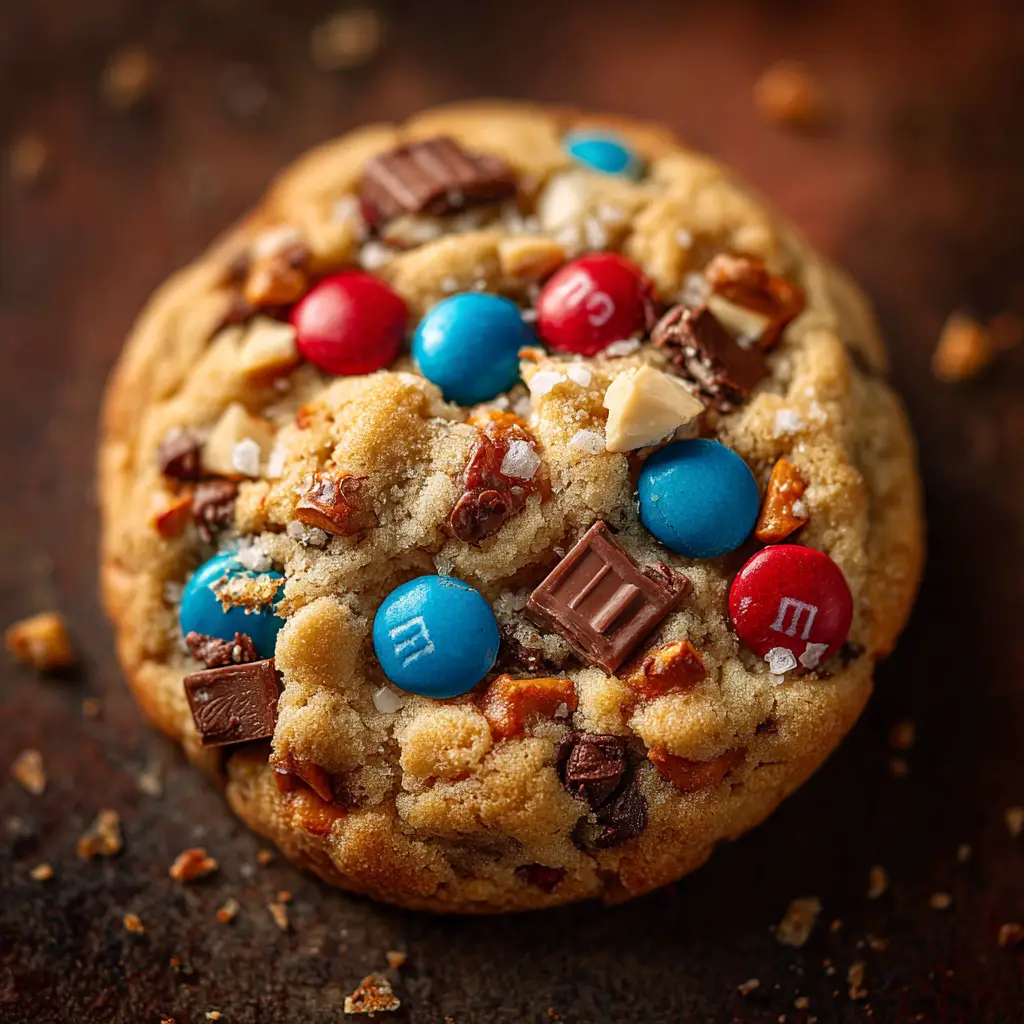
Ingredients You’ll Need
The foundation of our Christmas Kitchen Sink Cookies is a simple, no-fail cookie dough. From there, we add a festive mix of goodies to make them holiday-ready.
For the Cookie Dough:
- All-Purpose Flour: Provides the structure for our cookies.
- Baking Soda: Helps the cookies rise and spread perfectly.
- Salt: Balances the sweetness.
- Unsalted Butter: Make sure it’s softened to room temperature for a smooth dough.
- Granulated Sugar & Brown Sugar: A combination of both creates the perfect chewy texture and caramel notes.
- Eggs: Binds the ingredients together.
- Vanilla Extract: Adds a touch of warmth and flavor.
Our Favorite Christmas Mix-Ins:
- Semi-Sweet Chocolate Chips: A classic for a reason!
- Mini Pretzel Twists: For that essential salty crunch. Roughly chop them.
- Holiday M&Ms: The perfect festive color pop.
- Caramel Bits or Chopped Caramels: For a gooey, chewy surprise.
- Christmas Sprinkles: Because everything is better with sprinkles!
More Mix-In Ideas
Feel free to get creative! The best part about these cookies is that no two batches have to be the same. Here are some more ideas to inspire your next batch. For another fun holiday treat, consider making some easy snowman-themed Oreo balls.
| Salty & Crunchy | Sweet & Rich | Chewy & Fruity |
|---|---|---|
| Potato Chips | White Chocolate Chips | Dried Cranberries |
| Toasted Pecans | Butterscotch Chips | Toffee Bits |
| Salted Peanuts | Chopped Candy Bars | Shredded Coconut |
How to Make Christmas Kitchen Sink Cookies Step-by-Step
Follow these simple steps to create the most delicious and festive cookies of the season.
- Prep Your Station: Preheat your oven to 375°F (190°C) and line two baking sheets with parchment paper. This prevents sticking and makes cleanup a breeze.
- Combine Dry Ingredients: In a medium bowl, whisk together the flour, baking soda, and salt. Set it aside.
- Cream Butter and Sugars: In a large bowl using a stand mixer or hand mixer, beat the softened butter, granulated sugar, and brown sugar on medium speed until the mixture is light and fluffy, about 2-3 minutes.
- Add Eggs and Vanilla: Beat in the eggs one at a time, mixing well after each addition. Stir in the vanilla extract.
- Combine Wet and Dry: Gradually add the dry ingredient mixture to the wet ingredients, mixing on low speed until just combined. Be careful not to overmix!
- Add the Good Stuff: Gently fold in your mix-ins—the chocolate chips, chopped pretzels, M&Ms, caramel bits, and sprinkles—using a spatula. The dough will be thick and chunky.
- Scoop and Bake: Drop rounded tablespoons of dough onto the prepared baking sheets, about 2 inches apart. For a gourmet touch, press a few extra M&Ms and pretzel pieces onto the tops of the dough balls before baking.
- Bake to Perfection: Bake for 10-12 minutes, or until the edges are golden brown but the centers are still soft. They might look slightly underdone in the middle, which is the key to a chewy cookie!
- Cool Down: Let the cookies cool on the baking sheet for 5 minutes before transferring them to a wire rack to cool completely.
Pro Tips for Perfect Cookies
Want to take your Christmas Kitchen Sink Cookies from great to absolutely irresistible? Follow these expert tips.
- Chill the Dough: For thicker, chewier cookies that spread less, chill the dough for at least 30 minutes before baking. This solidifies the butter and results in a more flavorful cookie.
- Don’t Overmix: Once you add the flour, mix until it’s just barely combined. Overmixing develops gluten, which can lead to tough, dry cookies.
- Measure Flour Correctly: Spoon the flour into your measuring cup and level it off with a knife. Scooping directly from the bag can pack the flour and lead to dry cookies.
- Use Room Temperature Ingredients: Softened butter and room temperature eggs create a smoother, more uniform dough.
Storing and Freezing Your Cookies
These cookies are great for making ahead during the busy holiday season. Just like our favorite quick dinner rolls, a little prep goes a long way!
Storing at Room Temperature
Store baked cookies in an airtight container at room temperature for up to 5 days. For extra softness, add a slice of bread to the container!
Freezing Baked Cookies
Once completely cooled, place the cookies in a single layer on a baking sheet to flash-freeze for 30 minutes. Then, transfer them to a zip-top freezer bag. They’ll keep for up to 3 months.
Freezing Cookie Dough
Scoop the cookie dough balls onto a parchment-lined baking sheet and freeze until solid. Transfer the frozen dough balls to a freezer bag. You can bake them directly from frozen; just add 1-2 minutes to the baking time.
Frequently Asked Questions About Christmas Kitchen Sink Cookies
They’re called ‘kitchen sink cookies’ because they include a wide variety of mix-ins—basically, everything but the kitchen sink! The name reflects the recipe’s flexibility, allowing you to use up whatever snacks, candies, and chips you have in your pantry.
For a festive touch, we love a combination of salty, sweet, and colorful ingredients. Our favorites include semi-sweet chocolate chips, chopped pretzels, red and green M&Ms, and gooey caramel bits. Dried cranberries and white chocolate chips are also excellent additions.
Absolutely! You can prepare the dough and store it in an airtight container in the refrigerator for up to 3 days. You can also freeze the dough balls for up to 3 months for fresh-baked cookies anytime.
Store the cooled cookies in an airtight container at room temperature for up to 5 days. To maintain their chewy texture, you can add a slice of bread to the container, which helps regulate moisture.
The best way to prevent cookies from spreading is to chill the dough for at least 30 minutes before baking. This solidifies the butter, which helps the cookies hold their shape and results in a thicker, chewier texture.
The Perfect Holiday Treat
These Christmas Kitchen Sink Cookies are more than just a recipe; they are a canvas for your holiday creativity. They are the perfect treat to leave for Santa, bring to a party, or enjoy on a cozy winter night. We know you’ll love them as much as we do!
If you make this recipe, we’d love to see it! Share a photo and tag us on Pinterest. Happy holidays and happy baking!
Christmas Kitchen Sink Cookies Recipe

Christmas Kitchen Sink Cookies: The Ultimate Salty & Sweet Guide
Ingredients
Equipment
Method
- Preheat your oven to 375°F (190°C) and line two baking sheets with parchment paper.
- In a medium bowl, whisk together the flour, baking soda, and salt.
- In a large bowl, beat the softened butter, granulated sugar, and brown sugar on medium speed until light and fluffy, about 2-3 minutes.
- Beat in the eggs one at a time, followed by the vanilla extract.
- Gradually add the dry ingredient mixture to the wet ingredients, mixing on low speed until just combined. Do not overmix.
- Gently fold in the chocolate chips, chopped pretzels, M&Ms, caramel bits, and sprinkles with a spatula.
- Drop rounded tablespoons of dough onto the prepared baking sheets, about 2 inches apart.
- Bake for 10-12 minutes, or until the edges are golden brown and the centers are set but still soft.
- Let the cookies cool on the baking sheet for 5 minutes before transferring them to a wire rack to cool completely.
Nutrition
Notes
Feel free to substitute the mix-ins with your favorite pantry snacks like potato chips, toffee bits, or other leftover candy.
Store in an airtight container for up to 5 days.
Tried this recipe?
Let us know how it was!


