There is a specific kind of culinary magic that happens when a humble white onion is transformed into a towering stack of Homemade Onion Rings. We aren’t talking about the thin, wimpy circles found in the freezer aisle; we are crafting the kind of heavy, craggy, seasoned masterpieces that define the ultimate gastropub experience.
Imagine biting through a thick, golden-brown coating that shattered with a distinct audible crunch, revealing a soft, translucent, and sweet onion interior. This recipe focuses on achieving that exact structural integrity, ensuring the batter clings to the onion rather than sliding off in one sad piece.
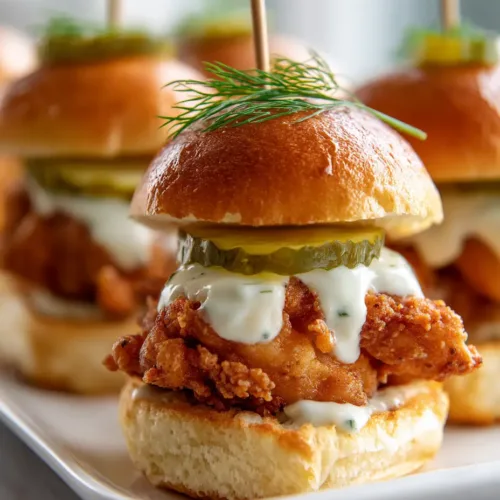
Whether you are serving these as the star of your next game-day spread or pairing them with a Bacon Ranch Crack Burger, these rings are designed to impress. With a garnish of finely chopped fresh parsley and a side of creamy orange dipping sauce, your kitchen is about to become the best steakhouse in town.

The Anatomy of the Perfect Extra-Crunchy Onion Ring
To achieve the visual and textural results seen in professional food photography, we must focus on three specific pillars: onion preparation, batter viscosity, and temperature control. Without these, you end up with greasy, soggy rings that lack that signature craggy texture.
- Thick-Cut Architecture: Cutting the onions into 3/4-inch (2cm) rounds ensures they are sturdy enough to support a heavy batter.
- The Double-Dredge Method: This creates the “craggy” surface by layering dry flour, wet batter, and a final textured coating.
- Translucent Interior: We use a specific frying duration to ensure the onion is fully cooked and tender, not raw and pungent.
- The Signature Sauce: A pale orange, creamy dip provides the necessary acid and fat to cut through the richness of the fried coating.
Essentials for the Ultimate Heavy-Batter Coating
Achieving a professional-grade result requires both the visible ingredients found in the blueprint and the “invisible” scientific workers that create the lift and crunch. Each component here serves a functional purpose in the culinary chemistry of frying.
2 large (approx. 500g) White Onions: White onions are preferred over yellow for their sharper bite and higher water content, which steams perfectly inside the batter shell. Slice them into thick, uniform rings to ensure even cooking.
2 cups (250g) All-Purpose Flour: This is the foundation of our crust. We divide this into two parts: one for the initial dredge and one for the seasoned wet batter.
1/2 cup (60g) Cornstarch: Cornstarch is the secret to a long-lasting crunch. It prevents gluten development, which ensures the coating stays crispy rather than becoming bread-like or chewy.
1 tsp (5g) Baking Powder: This provides the “lift” in the batter. When it hits the hot oil, it creates tiny carbon dioxide bubbles that result in that craggy, airy texture.
1 ½ cups (355ml) Ice-Cold Club Soda or Beer: The cold temperature is vital. It shocks the batter when it hits the oil, creating a light, crisp shell, while the carbonation adds further aeration.
1 tbsp (15g) Smoked Paprika & 1 tsp (5g) Garlic Powder: These provide the deep golden-brown hue and the savory base flavor that makes the batter “seasoned” rather than just salty.
1 quart (950ml) High-Smoke Point Oil: Use vegetable, canola, or peanut oil. You need an oil that can reach 375°F (190°C) without burning to achieve that perfect golden finish.
The Creamy Orange Dipping Sauce: A blend of 1/2 cup (120ml) Mayonnaise, 2 tbsp (30ml) Ketchup, 1 tsp (5ml) Prepared Horseradish, and a dash of cayenne. This creates the pale orange color and zesty flavor profile.
Fresh Garnish: 2 tbsp (10g) Finely chopped fresh parsley. This adds a pop of vibrant green and a fresh herbaceous note to the finished stack.
Must-Have Tools for Deep-Frying Success
To replicate the “tall stack” look and ensure your Homemade Onion Rings are cooked safely and effectively, you will need a few specific kitchen tools. Precision is the difference between a soggy mess and a golden triumph.
A heavy-bottomed Dutch oven or a deep cast-iron skillet is essential for heat retention. When you drop cold batter into the oil, the temperature will naturally dip; heavy pans help stabilize that heat.
You absolutely must use an instant-read thermometer or a candy thermometer. Frying by “vibe” leads to greasy food if the oil is too cold or burnt exteriors if it’s too hot. Aim for a consistent 375°F (190°C).
Finally, a wire cooling rack set over a baking sheet is superior to paper towels. Paper towels can actually trap steam under the rings, making the bottom side soggy. A rack allows air to circulate, keeping every inch of the craggy batter crisp.

A Step-by-Step Guide to Achieving the Perfect Deep-Fried Golden Crunch
Phase 1: Preparing the Onion Foundations
Peel the white onions and trim the ends. Slice them into thick 3/4-inch (2cm) slices. Carefully separate the layers into individual rings, reserving the smaller centers for another recipe like a Slow Cooker Hawaiian Chicken.
Pro Tip: Soak the raw rings in a bowl of ice water for 10 minutes, then pat them bone-dry. This removes the harsh sulfurous bite and helps the flour adhere better.
Phase 2: The Triple-Coat Dredging System
Set up three bowls. In the first, place 1/2 cup (60g) of flour. In the second, whisk together the remaining flour, cornstarch, baking powder, paprika, garlic powder, salt, and the ice-cold club soda until it reaches the consistency of thick pancake batter.
The third bowl should contain a small amount of extra seasoned flour. This “dry-wet-dry” sequence is what creates the heavy, craggy texture seen in the visual prompt. It builds layers of flavor and crunch.
Phase 3: The Art of the Deep Fry
Heat your oil to 375°F (190°C). Dip a dried onion ring into the plain flour, then submerge it in the thick batter. Let the excess drip off for just a second, then quickly toss it in the third bowl of seasoned flour before carefully dropping it into the oil.
Fry in small batches to avoid crowding the pan. Use a slotted spoon to flip them once. Look for the visual cue: a deep, uniform golden-brown color and a rigid, bubbly surface. This usually takes 2-3 minutes per side.
Phase 4: The Finishing Touches and Plating
Remove the rings and place them immediately on the wire rack. While still hot, sprinkle with a tiny bit more sea salt. Stack them vertically on a white ceramic plate to create that iconic “tall stack” height.
Sprinkle the finely chopped fresh parsley over the top. The green contrast against the golden batter is what makes the dish pop. Serve immediately with a ramekin of the pale orange dipping sauce on the side.
Expert Tips for the Ultimate Crunch
- Keep it Cold: If your batter starts to warm up while you are frying in batches, set the batter bowl inside a larger bowl filled with ice. Cold batter + Hot oil = Maximum Crunch.
- Don’t Overmix: When adding the liquid to the dry ingredients, whisk until just combined. A few lumps are actually good—they contribute to the craggy, textured surface.
- The Flour Shake: When doing the final dry dredge, shake the rings gently. This creates the “crispy flour textures” mentioned in the visual prompt.
- Oil Management: Between batches, use a fine-mesh skimmer to remove any loose bits of batter from the oil. These will burn if left in, giving your next batch a bitter taste.
The Best Way to Store and Reheat Homemade Onion Rings
Fried foods are always best eaten immediately, but if you have leftovers, do not use the microwave. The microwave will turn that beautiful craggy crust into a rubbery disappointment.
Store leftovers in an airtight container in the fridge for up to 2 days. To reheat, place them in a 400°F (200°C) oven or air fryer for 3-5 minutes. This will reactivate the oils and restore that signature crunch.
You can also freeze these! Flash-freeze them in a single layer on a sheet pan before transferring to a freezer bag. Reheat directly from frozen in the oven for a quick snack that beats any store-bought version.
Perfect Pairings for Your Golden Stack
These Homemade Onion Rings are versatile enough to accompany almost any meal. For a classic pub-style dinner, serve them alongside an Oven Baked Beef Brisket. The sweetness of the onions complements the smoky, savory meat perfectly.
If you’re looking for something lighter to balance the fried indulgence, a crisp Italian Grinder Salad provides the perfect acidic crunch to reset your palate between rings.
For those who love a variety of textures, try serving these as a side to Air Fried Zucchini Bites. It’s a great way to offer a “fried” vegetable platter that features both deep-fried and air-fried techniques.
Frequently Asked Questions
[faq_section]
The Ultimate Homemade Onion Rings Recipe
Homemade Onion Rings: The Secret to a Heavy, Craggy, Golden-Brown Crunch
Ingredients
Equipment
Method
- Slice white onions into thick 3/4-inch rings and separate. Soak in ice water for 10 minutes, then pat completely dry.
- Whisk flour, cornstarch, baking powder, and spices. Separate some dry mix for dredging, then add ice-cold club soda to the rest to create a thick batter.
- Heat oil in a Dutch oven to 375°F (190°C).
- Coat each ring in dry flour, then wet batter, then a final light dry flour toss. Fry for 2-3 minutes per side until deep golden-brown and craggy.
- Place on a wire rack to drain. Stack high on a plate, sprinkle with fresh parsley, and serve with the pale orange dipping sauce.
Nutrition
Notes
Use a wire rack instead of paper towels to prevent sogginess.
Tried this recipe?
Let us know how it was!
Join the Finger-Licking Community!
These Homemade Onion Rings are a labor of love that rewards you with every shattered-glass crunch. If you enjoyed this recipe, please leave a comment below and tell us how yours turned out! Did you go for the tall stack or serve them alongside a juicy burger?
Don’t forget to follow us on Pinterest for more visually stunning and delicious recipes. Sharing is caring—pin this recipe to your favorite boards so you never lose the secret to the perfect craggy batter!