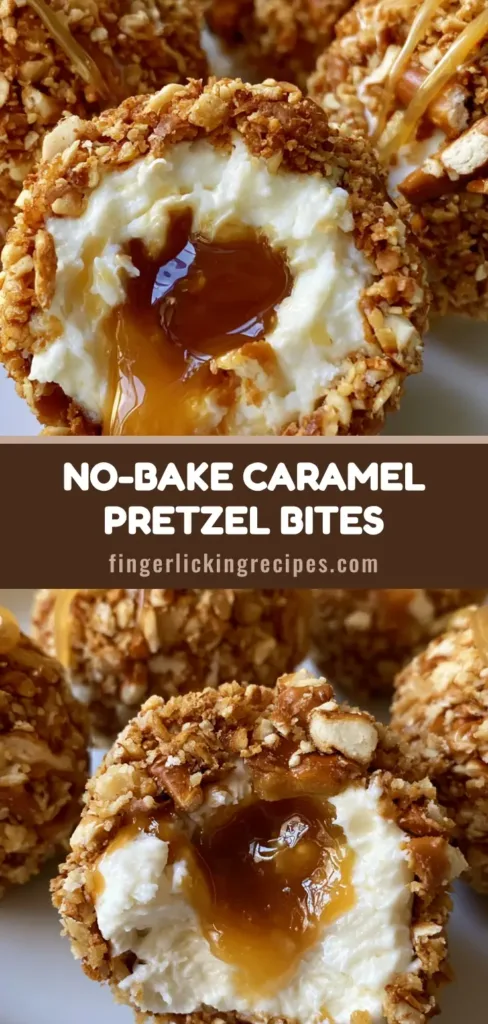
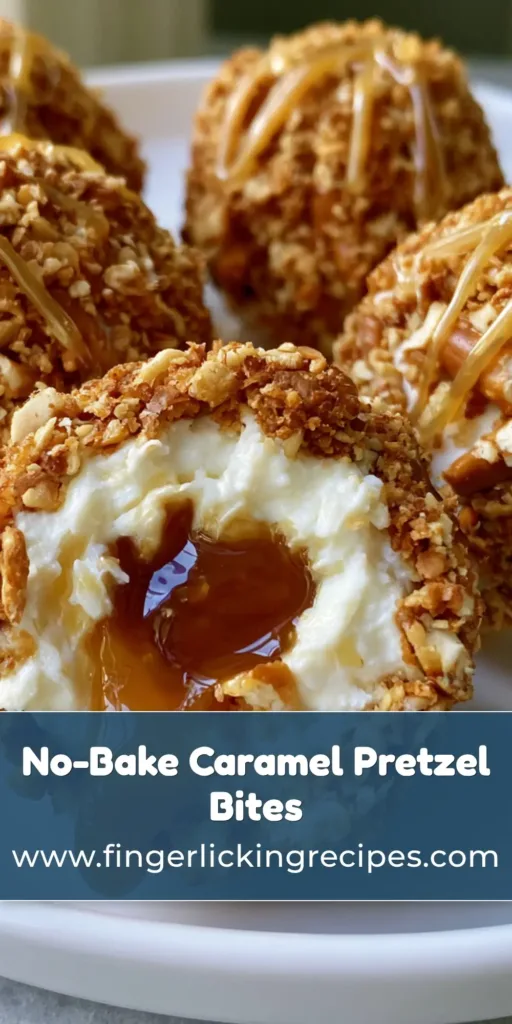
The Salted Caramel Pretzel Cheesecake Bites are the quintessential fusion of sophisticated dessert flavors and nostalgic snack-time crunch. Imagine a velvety, cloud-like cheesecake sphere that shatters into a salty pretzel crust before revealing a molten, liquid gold caramel center. These bite-sized marvels aren’t just a dessert; they are a masterclass in textural contrast and flavor balancing.
Whether you are hosting a high-end dinner party or looking for a crowd-pleasing snack for a weekend gathering, these cheesecake balls offer a professional-grade finish with minimal effort. The visual of the amber caramel flowing from a stark white cream cheese center is enough to stop any scroll on social media. Best of all, they require absolutely no oven time, keeping your kitchen cool and your prep work efficient.
In this guide, we will break down the culinary science of achieving that perfect “molten” core while ensuring your pretzel coating stays exceptionally crisp. We will explore the role of fat stability in no-bake fillings and how to choose the right caramel viscosity for that iconic “drip” effect seen in our professional food photography.
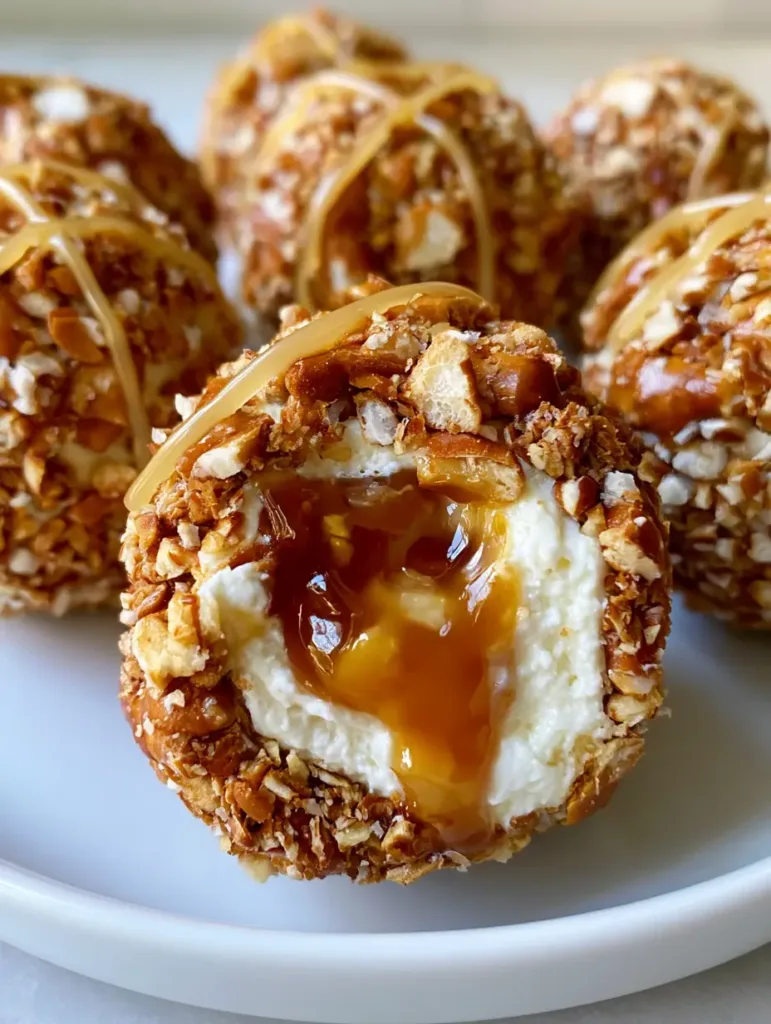
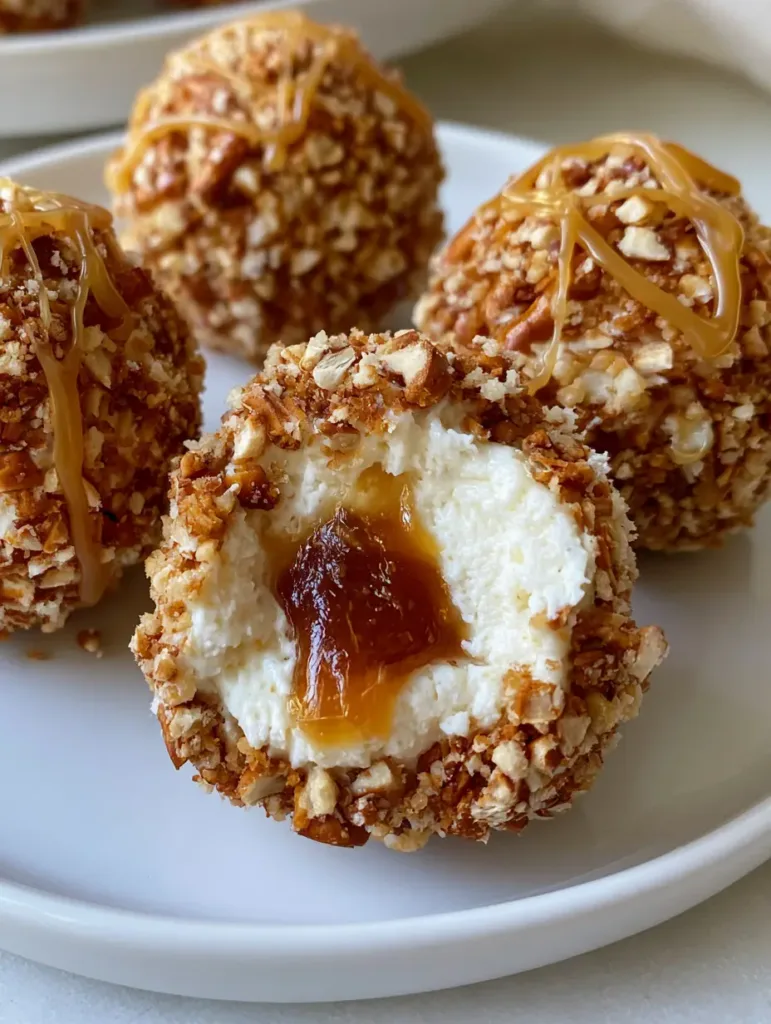
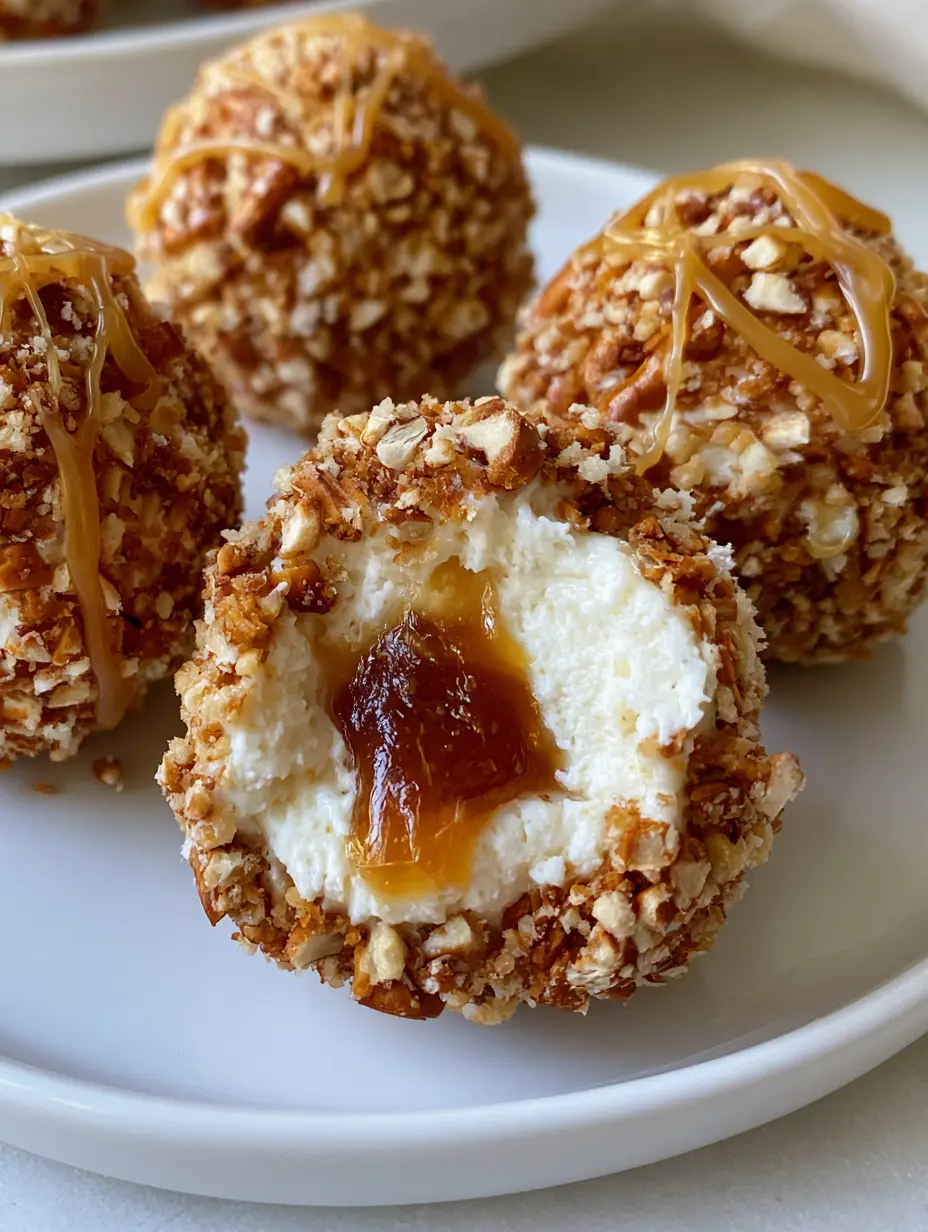
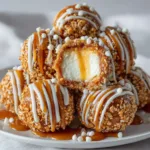
The viscous, glossy amber-colored salted caramel core flows out beautifully.
Why You Will Absolutely Crave These Salted Caramel Pretzel Cheesecake Bites
The Liquid Gold Surprise: Every sphere features a hidden, viscous salted caramel core that provides an immediate burst of luxury upon the first bite.
Multidimensional Texture: You get the jagged, crystalline crunch of crushed pretzels paired with the ultra-smooth, dense texture of premium cream cheese.
Perfectly Balanced Profile: The intense sweetness of the amber caramel sauce is cut by the sharp salinity of the pretzels and the tangy brightness of the cream cheese.
No-Bake Simplicity: Achieve gourmet results without ever touching your oven dial, making these a perfect year-round recipe for busy home cooks.
The Essential Elements for a Flawless Sweet and Salty Crunch
To recreate the Salted Caramel Pretzel Cheesecake Bites seen in our visuals, you need specific ingredients that offer both structural integrity and high-impact flavor. We aren’t just mixing sugar and cheese; we are building a stable emulsion that can hold a liquid center.
Full-Fat Brick Cream Cheese: You will need 16 oz (450g) of high-quality cream cheese. It must be the brick variety, not the spreadable tub kind, to ensure the spheres hold their shape at room temperature.
Crushed Salted Pretzels: Approximately 2 cups (120g) of finely crushed mini pretzels provide the outer armor. The salt on the pretzels is crucial for activating your taste buds and balancing the sugar in the filling.
Thick Salted Caramel Sauce: You will need 1/2 cup (120ml) for the centers and extra for the translucent golden drizzle. Look for a “sea salt” version to enhance the “salted” aspect of the recipe name.
Powdered Sugar: 1 cup (120g) of sifted powdered sugar provides sweetness while helping to stiffen the cream cheese filling through its cornstarch content. This is essential for the “dense, smooth” look described in the visual prompt.
Pure Vanilla Bean Paste: 1 tsp (5ml) adds those beautiful black specks and a deep floral aroma that elevates the cream cheese from basic to artisanal. If you don’t have paste, a high-quality extract will suffice.
Unsalted Butter: 4 tbsp (56g) of softened butter added to the filling provides a luxurious mouthfeel and helps the bites firm up significantly when chilled in the refrigerator.
Mastering the Perfect Spherical Cheesecake Form
To achieve the “spherical cheesecake base” and “handheld” scale of this recipe, a few specific tools will make your life significantly easier. Precision is the difference between a messy ball and a professional-looking truffle.
A small cookie scoop (about 1 tablespoon capacity) is your best friend here. It ensures every one of your Salted Caramel Pretzel Cheesecake Bites is identical in size, which is key for even coating and presentation. You will also need a food processor to achieve the “heavily coated, textured layer” of pretzels; you want a mix of fine dust and small, crunchy fragments.
Lastly, ensure you have a parchment-lined baking sheet. This prevents the sticky cream cheese from adhering to your surfaces before the pretzel coating is applied. If you enjoy making bite-sized treats, you might also love our easy corn dog bites for a savory version of handheld snacking.
Notice the thick, textured layer of golden-brown crushed salted pretzels.
The Culinary Blueprint: Constructing Your Cheesecake Masterpiece
Phase 1: Preparing the Molten Caramel Centers
The secret to the “viscous, glossy amber-colored salted caramel core” is freezing the caramel before assembly. If the caramel is room temperature, it will simply bleed into the cheese and disappear.
Line a small plate with parchment paper. Drop 1/2 teaspoon portions of salted caramel sauce onto the paper, making about 18–20 small mounds. Place these in the freezer for at least 30 minutes until they are firm enough to be handled quickly with your fingertips.
Phase 2: Whipping the Velvety Filling
In a large mixing bowl, beat your 16 oz (450g) of softened cream cheese and 4 tbsp (56g) of butter until completely smooth. There should be no visible lumps; use a rubber spatula to scrape the sides of the bowl frequently to ensure a uniform texture.
Slowly sift in the 1 cup (120g) of powdered sugar and add the vanilla bean paste. Beat on low speed until incorporated, then increase to medium-high for 2 minutes. The filling should look “dense and smooth” just like the interior in our sliced-open visual prompt.
Phase 3: Encapsulating the Core
Scoop a tablespoon of the cheesecake mixture into your hand and flatten it slightly. Quickly remove one frozen caramel disc from the freezer and place it in the center. Gently fold the cheesecake edges over the caramel, rolling it between your palms to form a perfect sphere.
Work quickly so the caramel doesn’t melt from the heat of your hands. Place the formed spheres back onto the parchment-lined sheet and chill for 1 hour. This step is non-negotiable for structural stability before the final coating process.
Phase 4: The Crunchy Pretzel Armor
Place your 2 cups (120g) of salted pretzels in a food processor and pulse until you have a coarse crumb. Transfer these to a shallow bowl. Rolling the chilled spheres in these crumbs creates the “thick, textured layer of golden-brown crushed salted pretzels” mentioned in the blueprint.
Press the crumbs firmly into the surface of the cheesecake balls. The moisture from the cream cheese will act as a natural adhesive. For a similar cream-cheese based delight, check out our silky cream cheese fruit dip which uses a similar flavor base.
Phase 5: The Translucent Golden Drizzle
Once all the Salted Caramel Pretzel Cheesecake Bites are coated, place them on a clean white ceramic plate for serving. Take your remaining caramel sauce and warm it slightly until it reaches a “flowing” consistency.
Using a spoon or a small piping bag, create thin, delicate drizzles in a webbed pattern across the top of the balls. This adds that final “glossy” highlight that makes the dish look like professional food photography. If you are a fan of cheesecake variations, don’t miss our hot fudge sundae brownie cheesecake for a larger-scale indulgence.
Pro-Tips for Achieving the Ultimate Caramel Lava Core
Temperature Control: If the cream cheese gets too soft while rolling, pop the bowl in the freezer for 10 minutes. Cold dough is much easier to manipulate into perfect spheres.
Pretzel Precision: Do not crush the pretzels into a fine powder. You want “fragments” to provide the visual and physical “crunchy” highlights mentioned in the Midjourney prompt.
Salt Balance: If your caramel sauce isn’t specifically “salted,” add a tiny pinch of flaky sea salt to each frozen caramel mound before wrapping it in the cheesecake mixture.
The “Drip” Shot: To get that “viscous core flowing out” look for your own photos, let the bites sit at room temperature for 10 minutes before slicing. This allows the frozen caramel core to return to a liquid state.
Preserving the Crunch: Storage and Make-Ahead Advice
These Salted Caramel Pretzel Cheesecake Bites are best served within 4 hours of coating with the pretzels. Pretzels are hygroscopic, meaning they absorb moisture from the cream cheese, which can lead to them losing their crunch over time.
If you need to make them ahead of time, store the uncoated cheesecake spheres in an airtight container in the refrigerator for up to 3 days. Simply roll them in the fresh pretzel crumbs and apply the caramel drizzle just before your guests arrive to ensure the textures are exactly as described in our culinary blueprint.
You can also freeze the uncoated balls for up to a month. Thaw them in the fridge overnight before finishing with the pretzels and caramel. For more make-ahead dessert inspiration, see our lemon raspberry sandwich cookies.
Curating the Ultimate Dessert Spread
These bites are rich and decadent, so they pair beautifully with lighter, fruit-forward options. Consider serving them alongside a fresh fruit platter or a bowl of whipped cream. The contrast between the salty pretzels and a sweet berry coulis can be quite refreshing.
If you are looking for a complete party menu, these bites act as the perfect “sweet” ending to a meal of lemon garlic butter salmon (coming soon). The citrus notes of the salmon prepare the palate for the heavy, buttery caramel and cream cheese of the dessert.
Common Curiosities Regarding No-Bake Cheesecake Spheres
Many home cooks wonder why their no-bake treats don’t hold their shape. Usually, this is due to using “tub” cream cheese or not chilling the mixture long enough. Follow the specific “brick” requirement and the multiple chilling phases mentioned above for a professional result every time.
Yes, but ensure it is a thick, high-quality salted caramel sauce. If it is too thin, it won’t freeze properly into the mounds needed for the liquid core.
The salt on the pretzels and in the salted caramel sauce is usually sufficient. However, a pinch of Maldon sea salt on top of the drizzle can enhance the flavor further.
The Official Salted Caramel Pretzel Cheesecake Bites Recipe
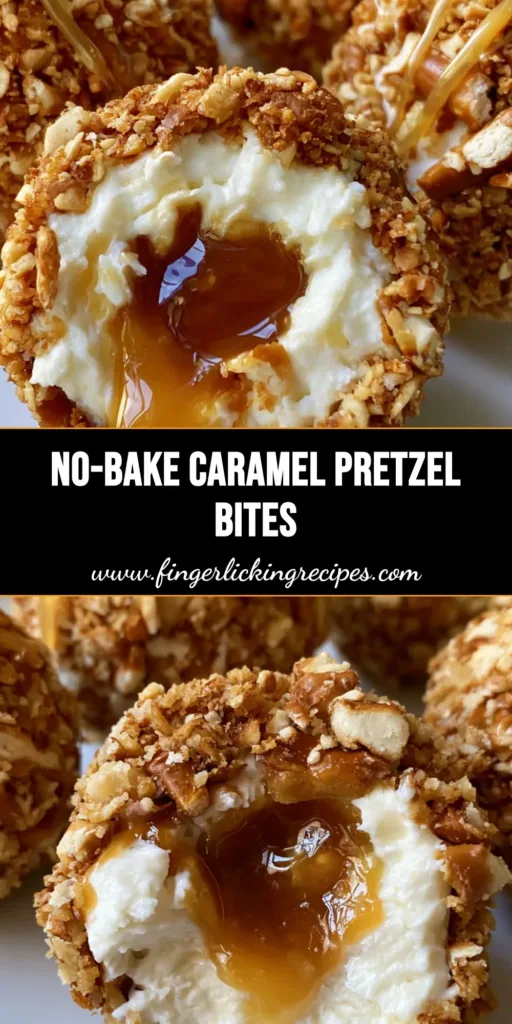
These Salted Caramel Pretzel Cheesecake Bites feature a smooth cream cheese filling, a molten liquid caramel core, and a crunchy salted pretzel coating. A perfect no-bake dessert for parties and sweet-and-salty lovers.
The ultimate sweet and salty treat with a molten caramel surprise.The ultimate sweet and salty treat with a molten caramel surprise.
Closing Thoughts on This Sweet & Salty Masterpiece
Mastering the Salted Caramel Pretzel Cheesecake Bites is a surefire way to elevate your dessert repertoire. The combination of the hidden liquid core and the aggressive pretzel crunch creates a sensory experience that is far superior to a traditional slice of cake. We hope you enjoy the “un-edited, authentic” beauty of these bites in your own kitchen!
Did you manage to get that perfect caramel drip? We want to see your results! Leave a comment below, sign up for our newsletter for more “Forensic Visual” recipes, and be sure to share your creations with us on Pinterest.
The ultimate sweet and salty treat with a molten caramel surprise.
Hi, I’m Emily Carter, and welcome to FL Recipes! I share simple, healthy recipes that make cooking easy, fun, and delicious for everyone. more about me »